swift로 iOS 네이티브 앱을 개발하는 중
Supabase Auth 로 로그인을 구현하기로 했다.
인터넷을 좀 찾아보면서 하는데
firebase에 비해서 상대적으로 정보도 부족하고
블로그나 유튜브 영상도 애매하고
gpt나 클로드에서도 좀 애매하게 알려줘서
굉장히 헷갈리는 부분이 많았다.
내 나름 공식문서랑 삽질한 결과를 남겨 놓겠다!
(사실 native로 그냥 구현하는 건 제일 단순하고 쉬운 건데
더 어려운 다른 정보들이랑 혼자 헷갈려서.. 좀 쓸데 없이 헤맸다 )
오늘의 뽀인트는 "swift로 네이티브 iOS 앱을 개발하면서
애플로그인을 구현하는 방식"이다.
일단 supabase에서 제공하는 관련 공식문서는 여기다.
https://supabase.com/docs/guides/auth/social-login/auth-apple?queryGroups=platform&platform=swift
Login with Apple | Supabase Docs
Use Sign in with Apple with Supabase
supabase.com
오늘 포스팅에서는 Supabase Auth만 써서 로그인만 구현하려고 한다.
추후 db도 사용할 계획이 있지만
당장은 Auth만 쓰는 것에 집중했다는 점 참고부탁드린다!
0 - 1. Supabase - Organization, Project 생성되었다는 전제
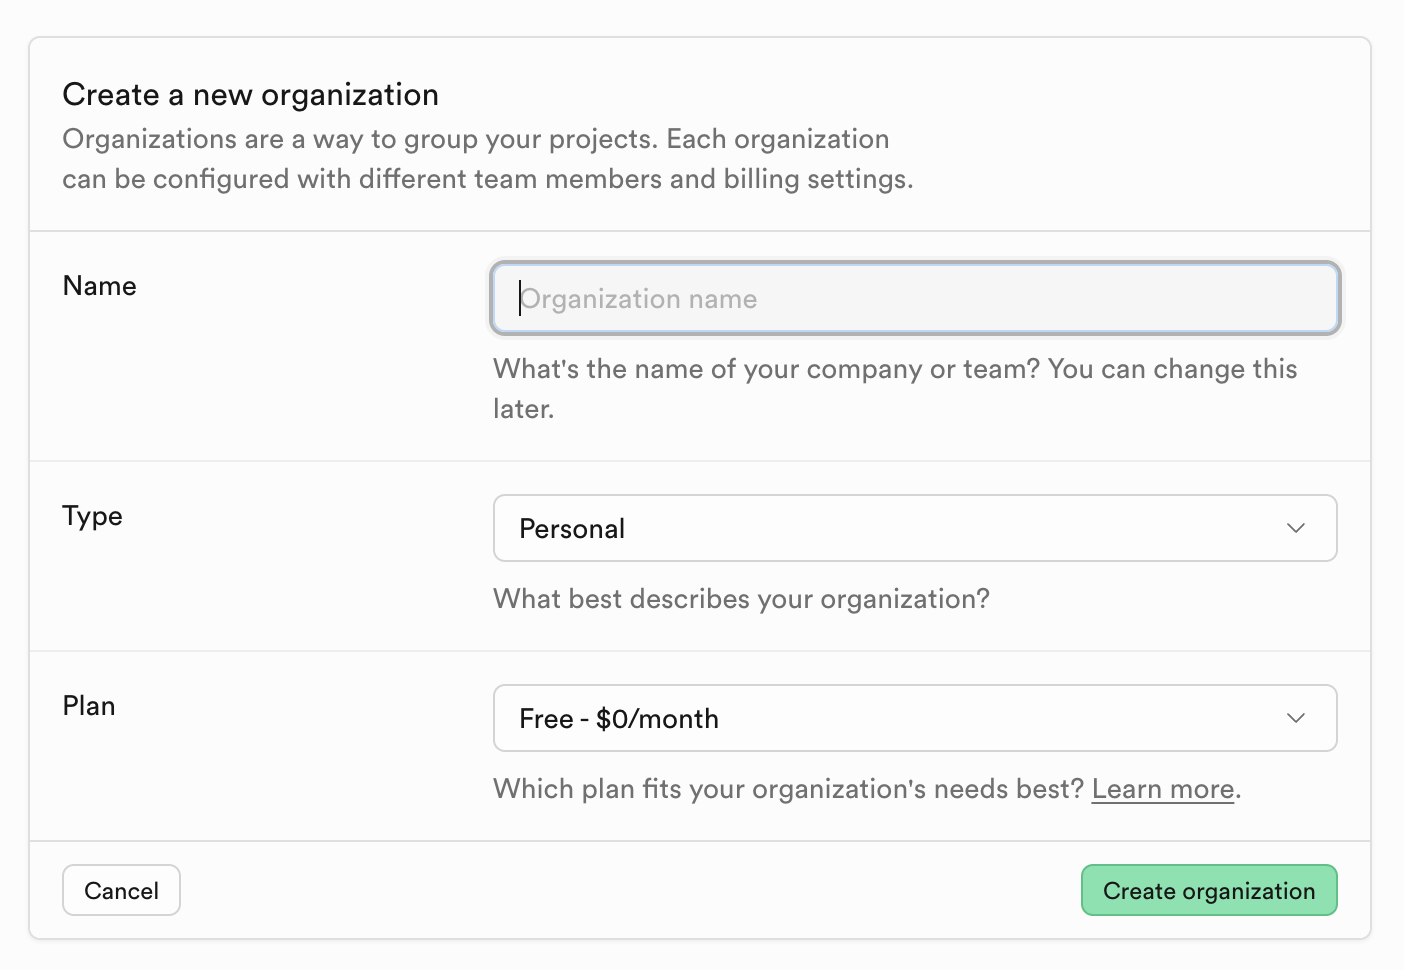

Supabase 서비스를 사용하기 위해
organization과 그 안에 project를 생성해야 한다.
이 부분은 본 포스팅의 메인 주제가 아니므로
자세히 다루지 않겠다.
프로젝트를 막 생성한 상태라는 전제로 시작하겠다.
0 - 2. swift 로 개발 중이 앱이 있고 애플 개발자 계정이 있다는 전제

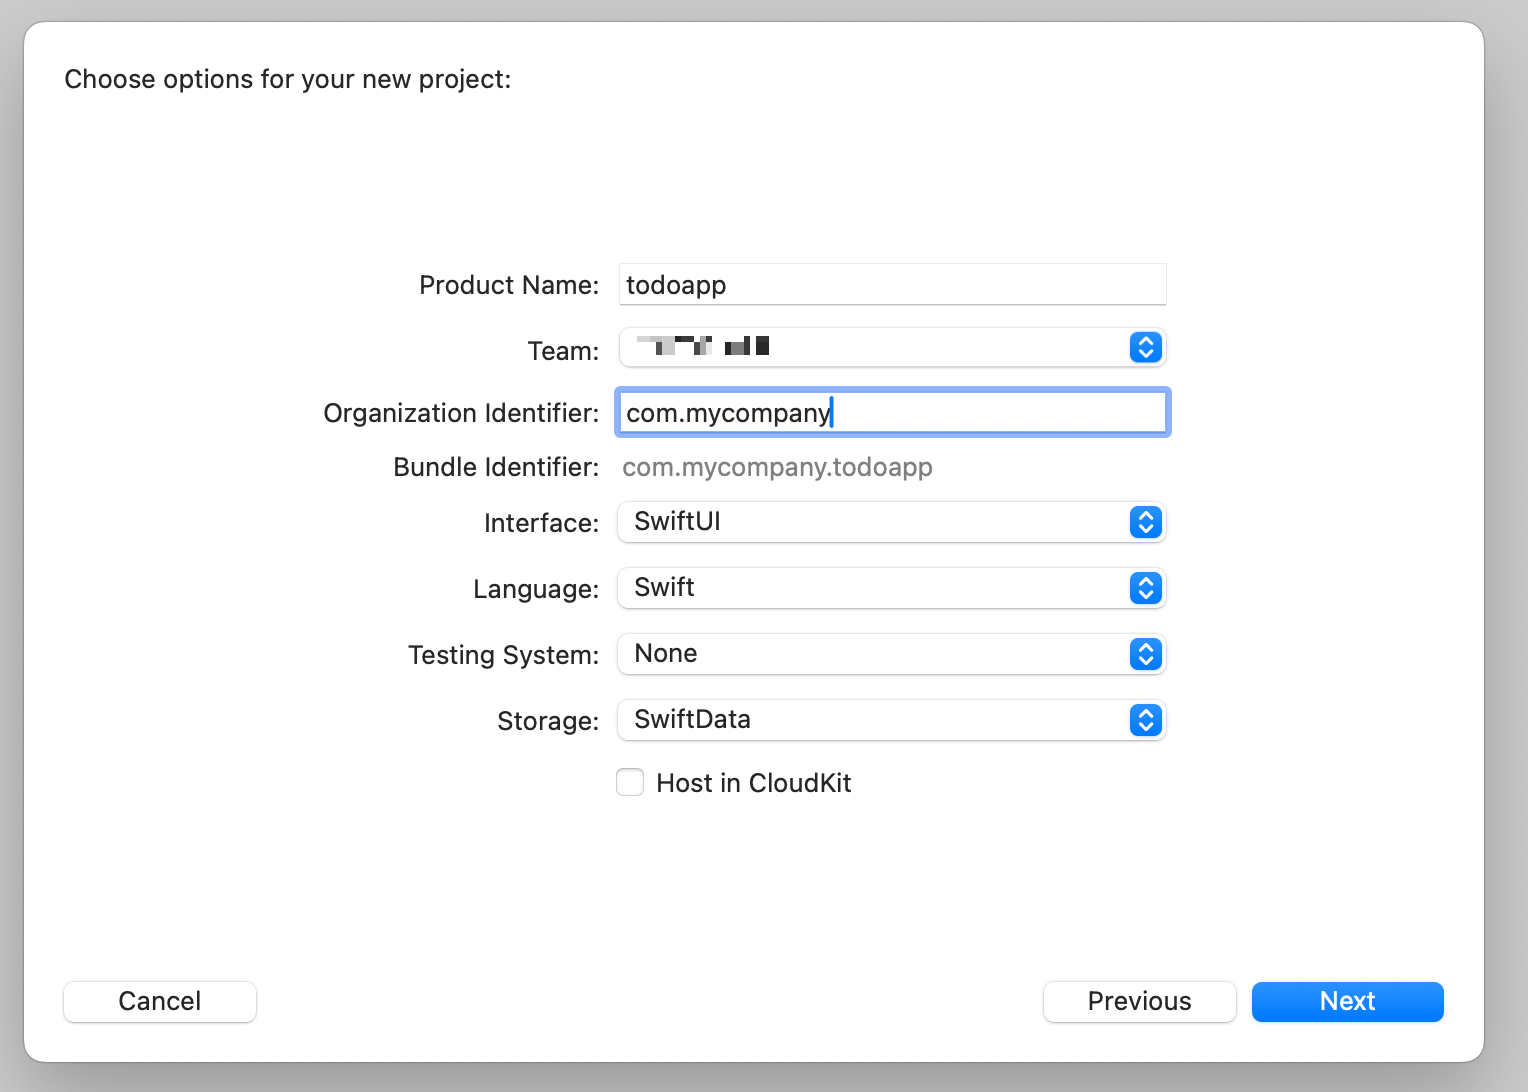
Xcode로 앱 프로젝트를 만들고
Bundle ID도 생성했다는 전제로 시작하겠다.
(이 또한 out of scope..)
간략히 적어놓자면
Product Name, Organization Identifier 를 입력하면
Bundle identifier가 생성된다.
이게 앱 번들에 대한 Bundle ID라고 보면 된다.
(이따가 Supabase에서 Client ID 입력할 때 필요함)
또한 애플 개발자 계정이 있어야
Sign in with Apple 을 쓸 수 있기 때문에
애플 개발자 계정을 결제하고,
Team에서도 해당 계정을 선택한 상태여야 한다.
1. Supabase 에서의 설정
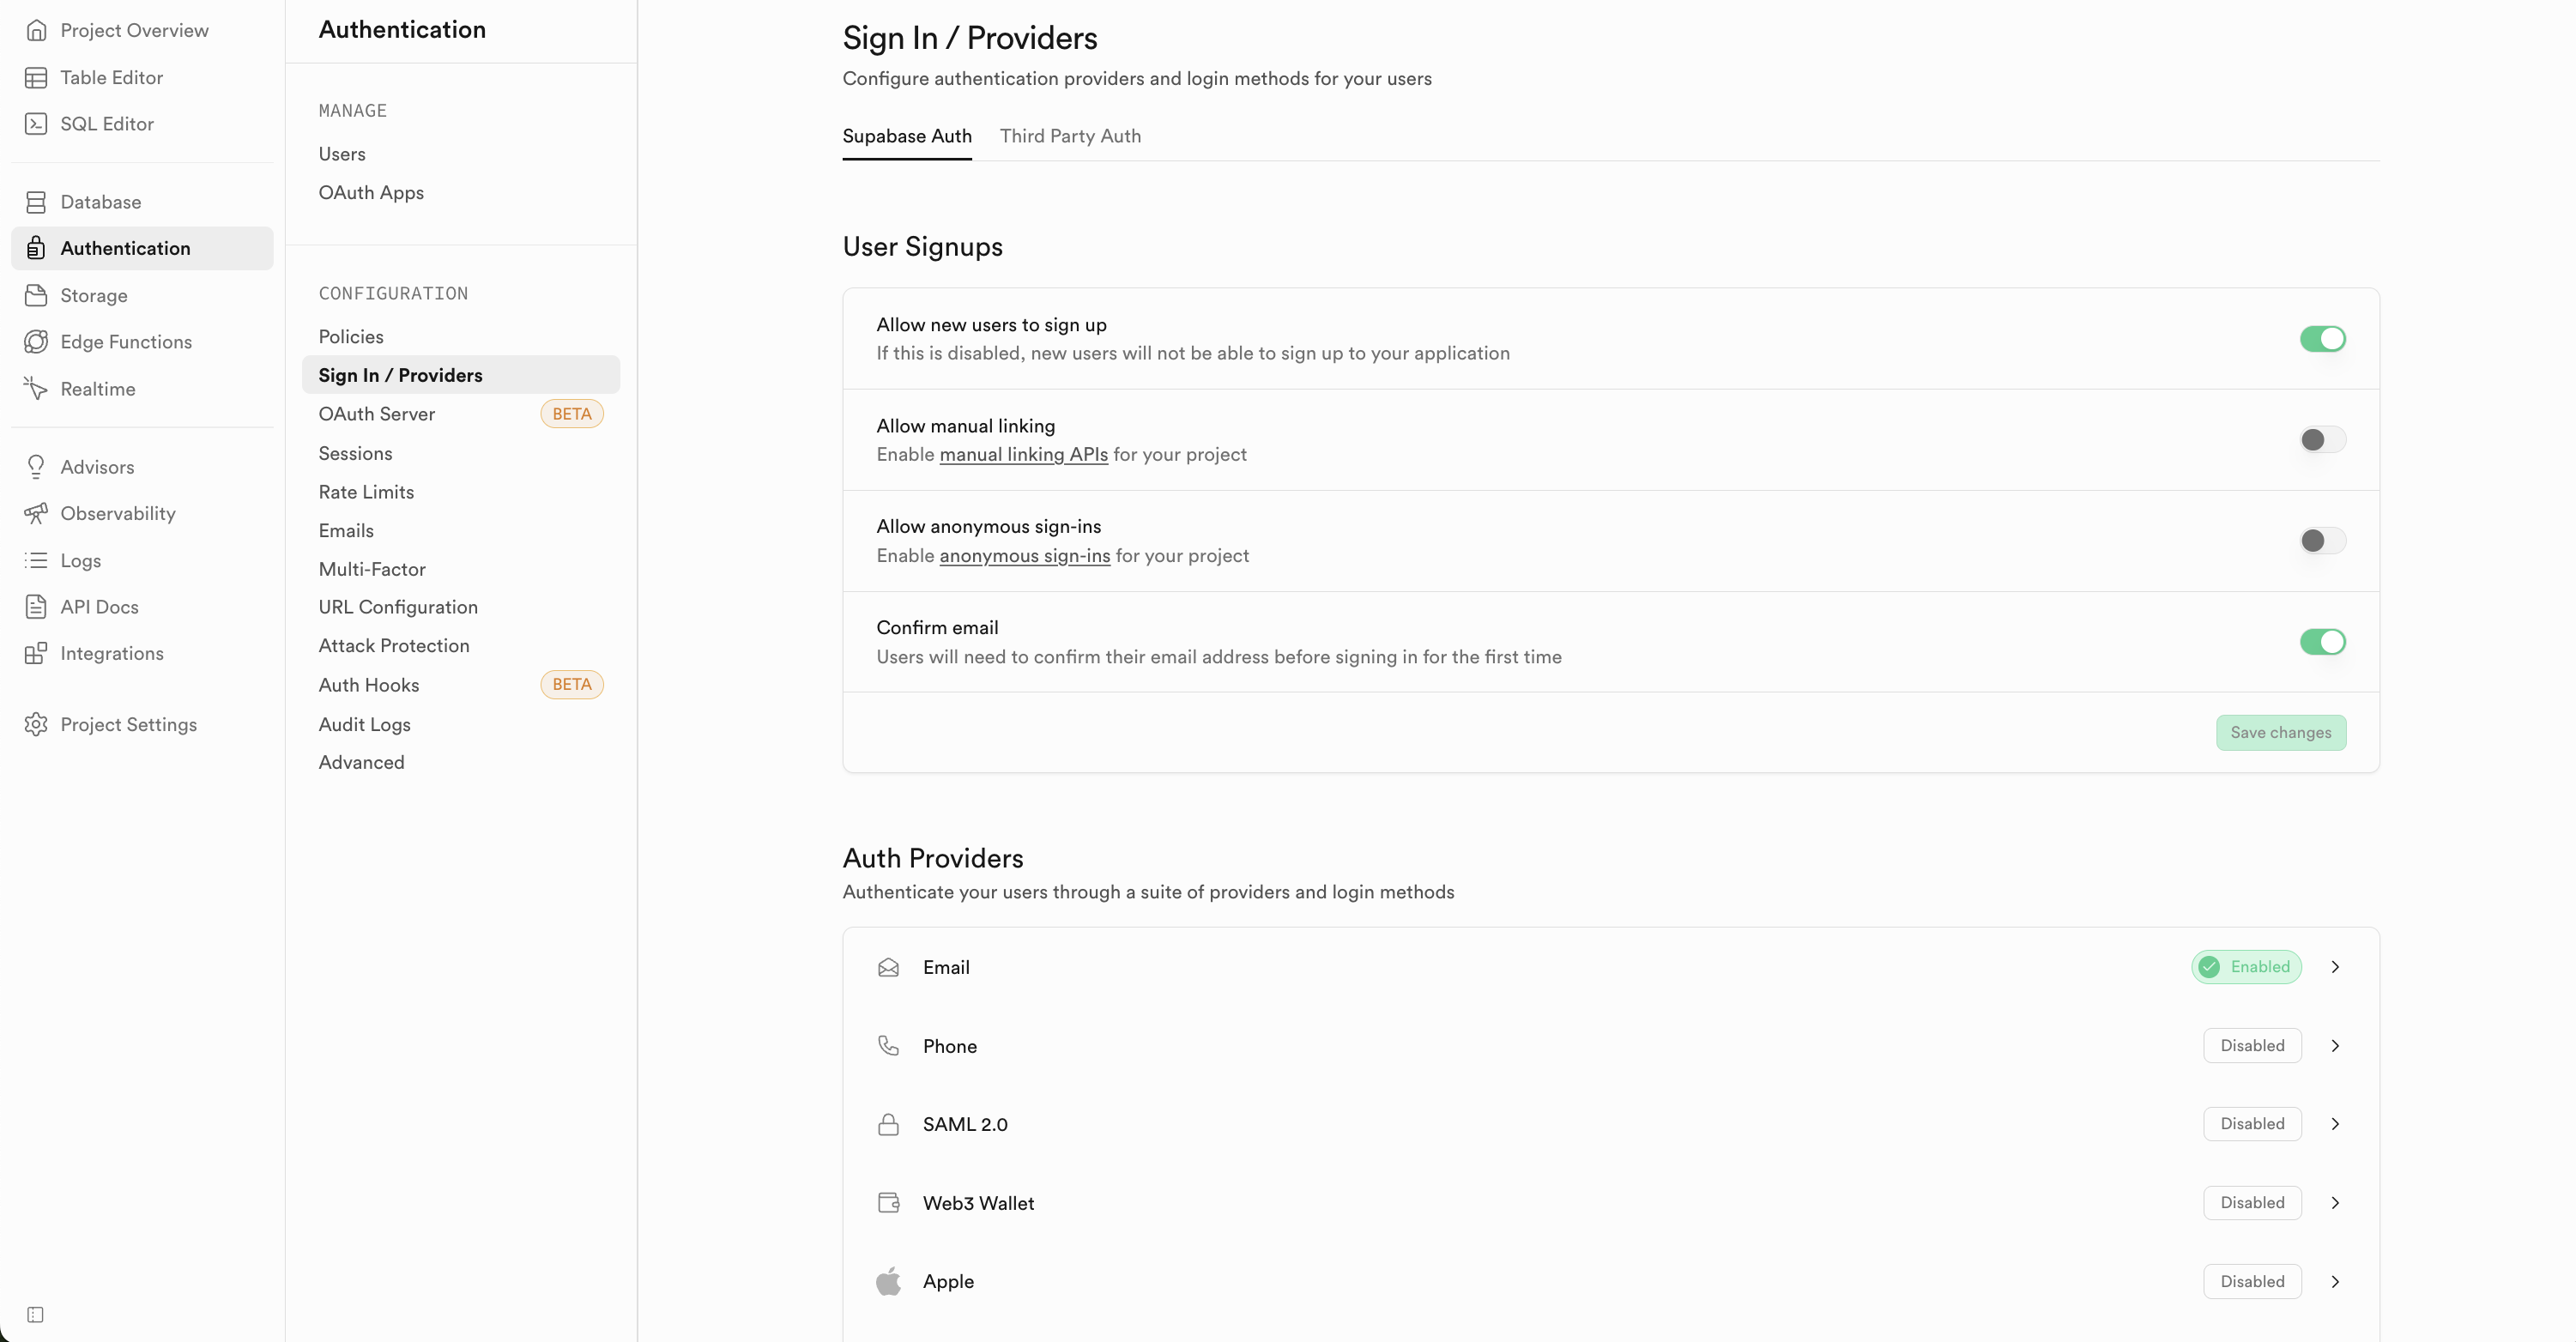
Supabase 프로젝트 내 메뉴에서
Authentication > CONFIGURATION - Sign In/Provider에 들어가면
다양한 Auth Providers 옵션을 볼 수 있다.
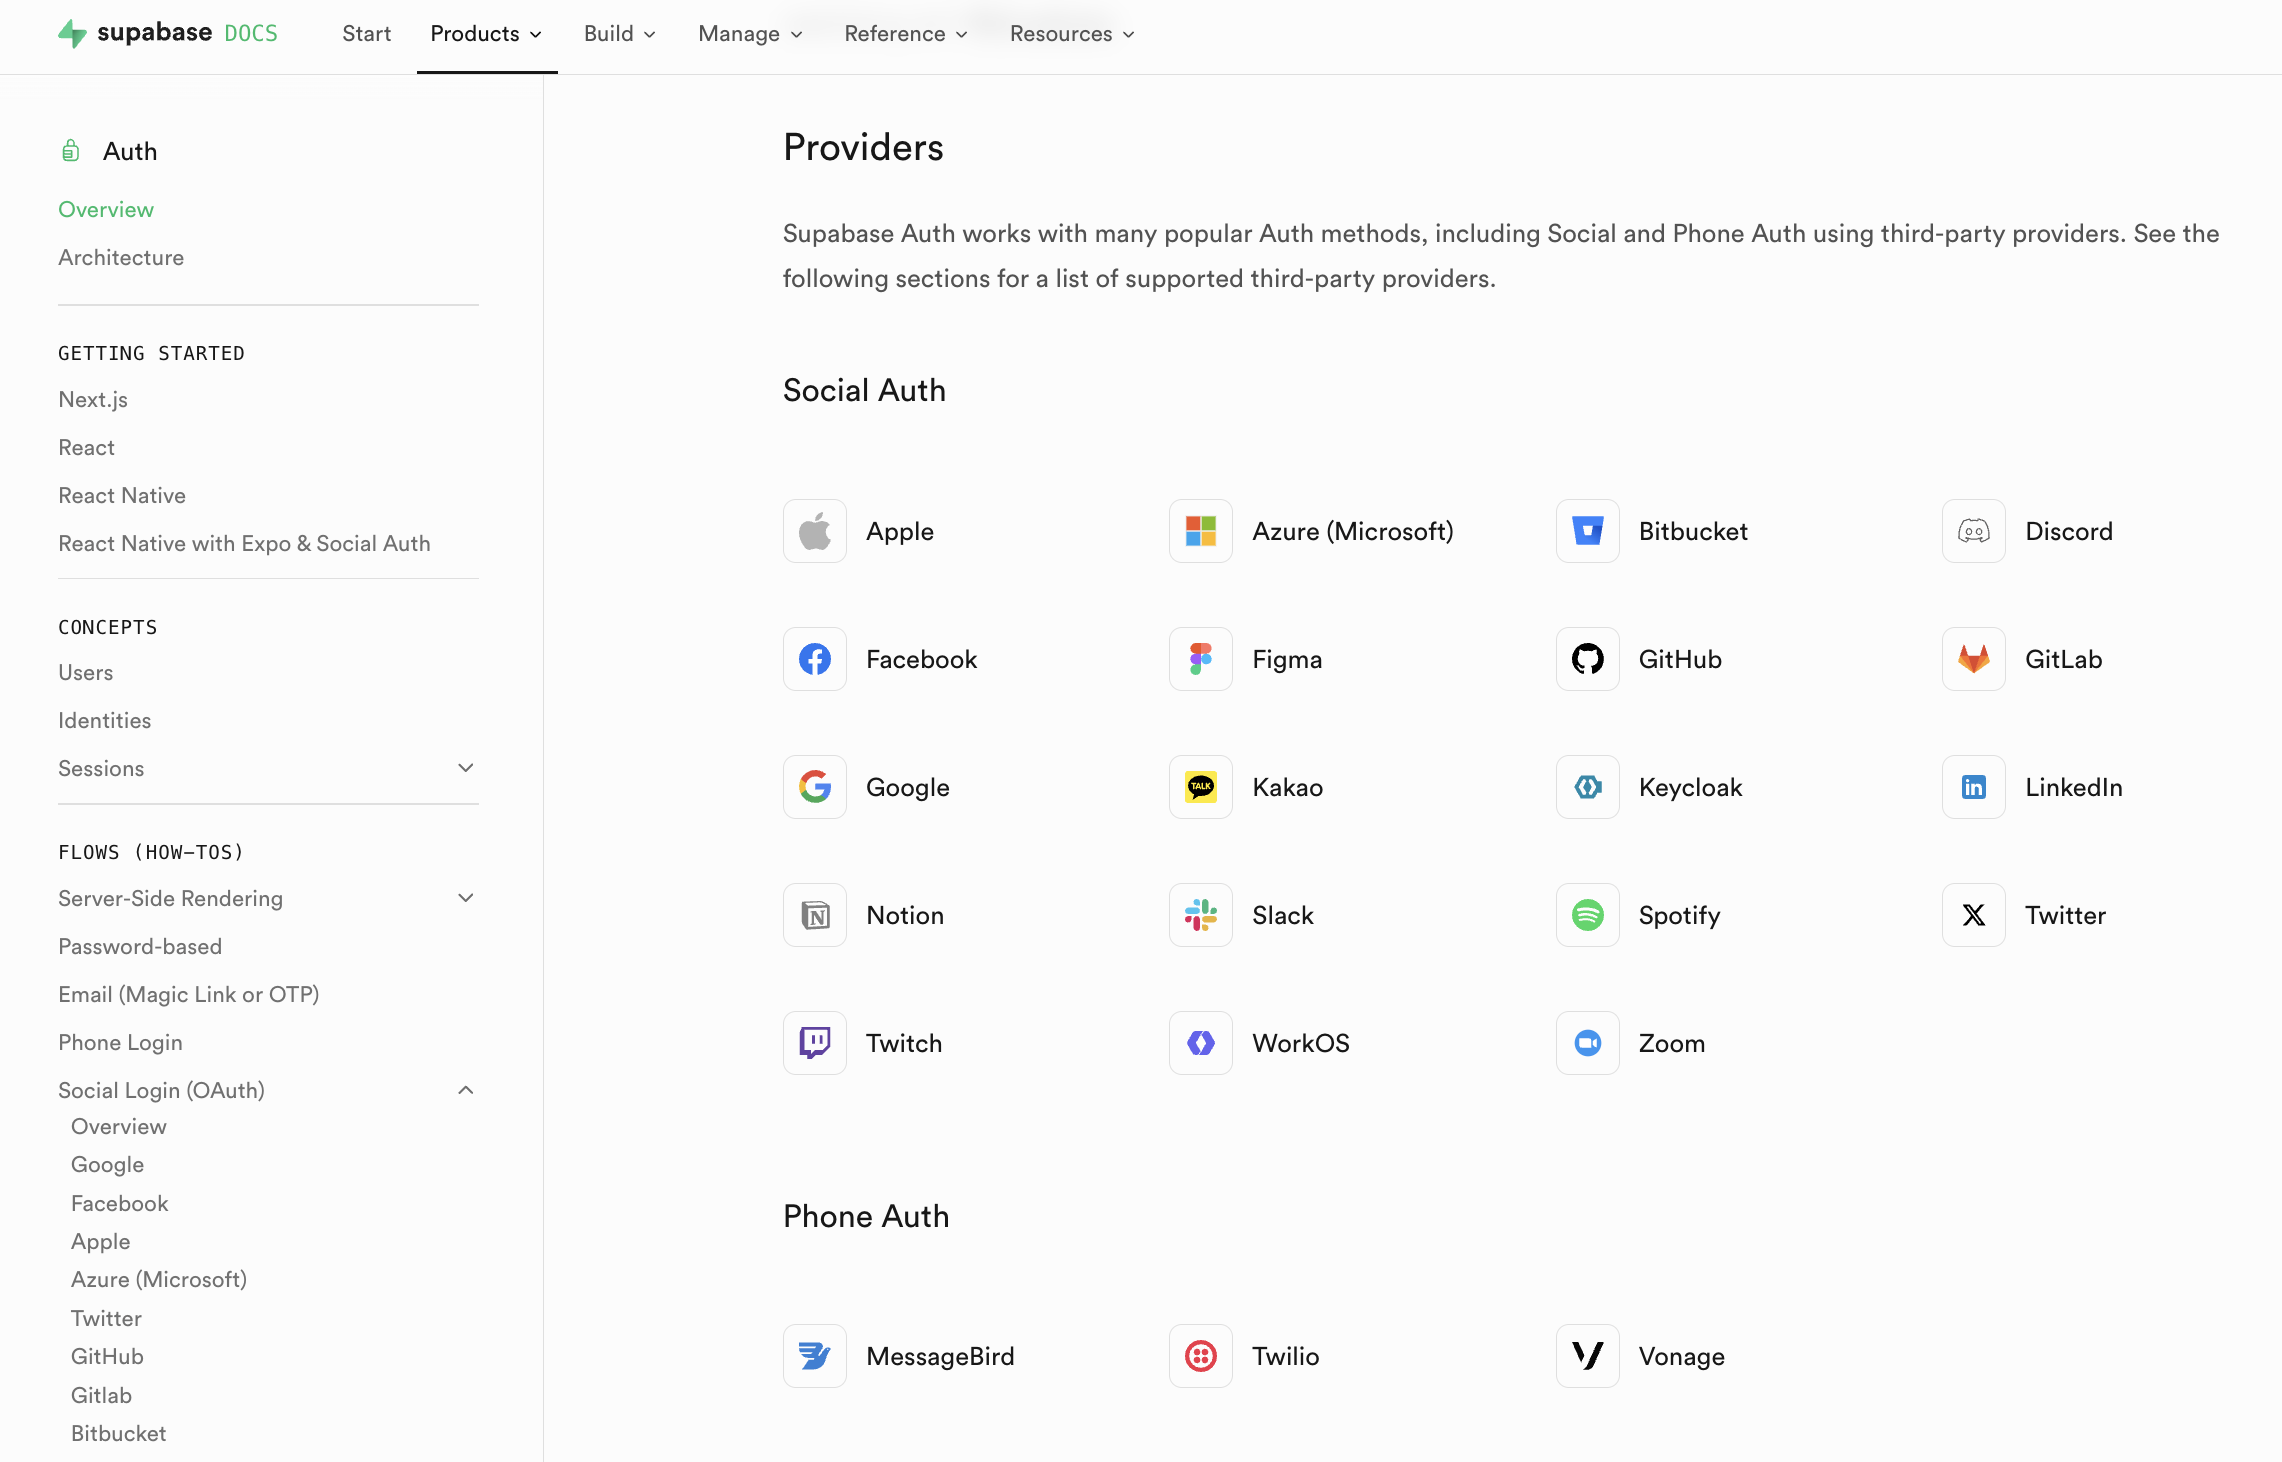
참고로 Supabase Docs의
Auth > Overview 에서도
모든 provider를 확인할 수 있다.
https://supabase.com/docs/guides/auth
Auth | Supabase Docs
Use Supabase to Authenticate and Authorize your users.
supabase.com
현재 기준 (2025.11) 무려 카카오톡도 있다.
네이버는 없다
아무튼 Authentication > CONFIGURATION - Sign In/Provider
여기로 다시 돌아와서,
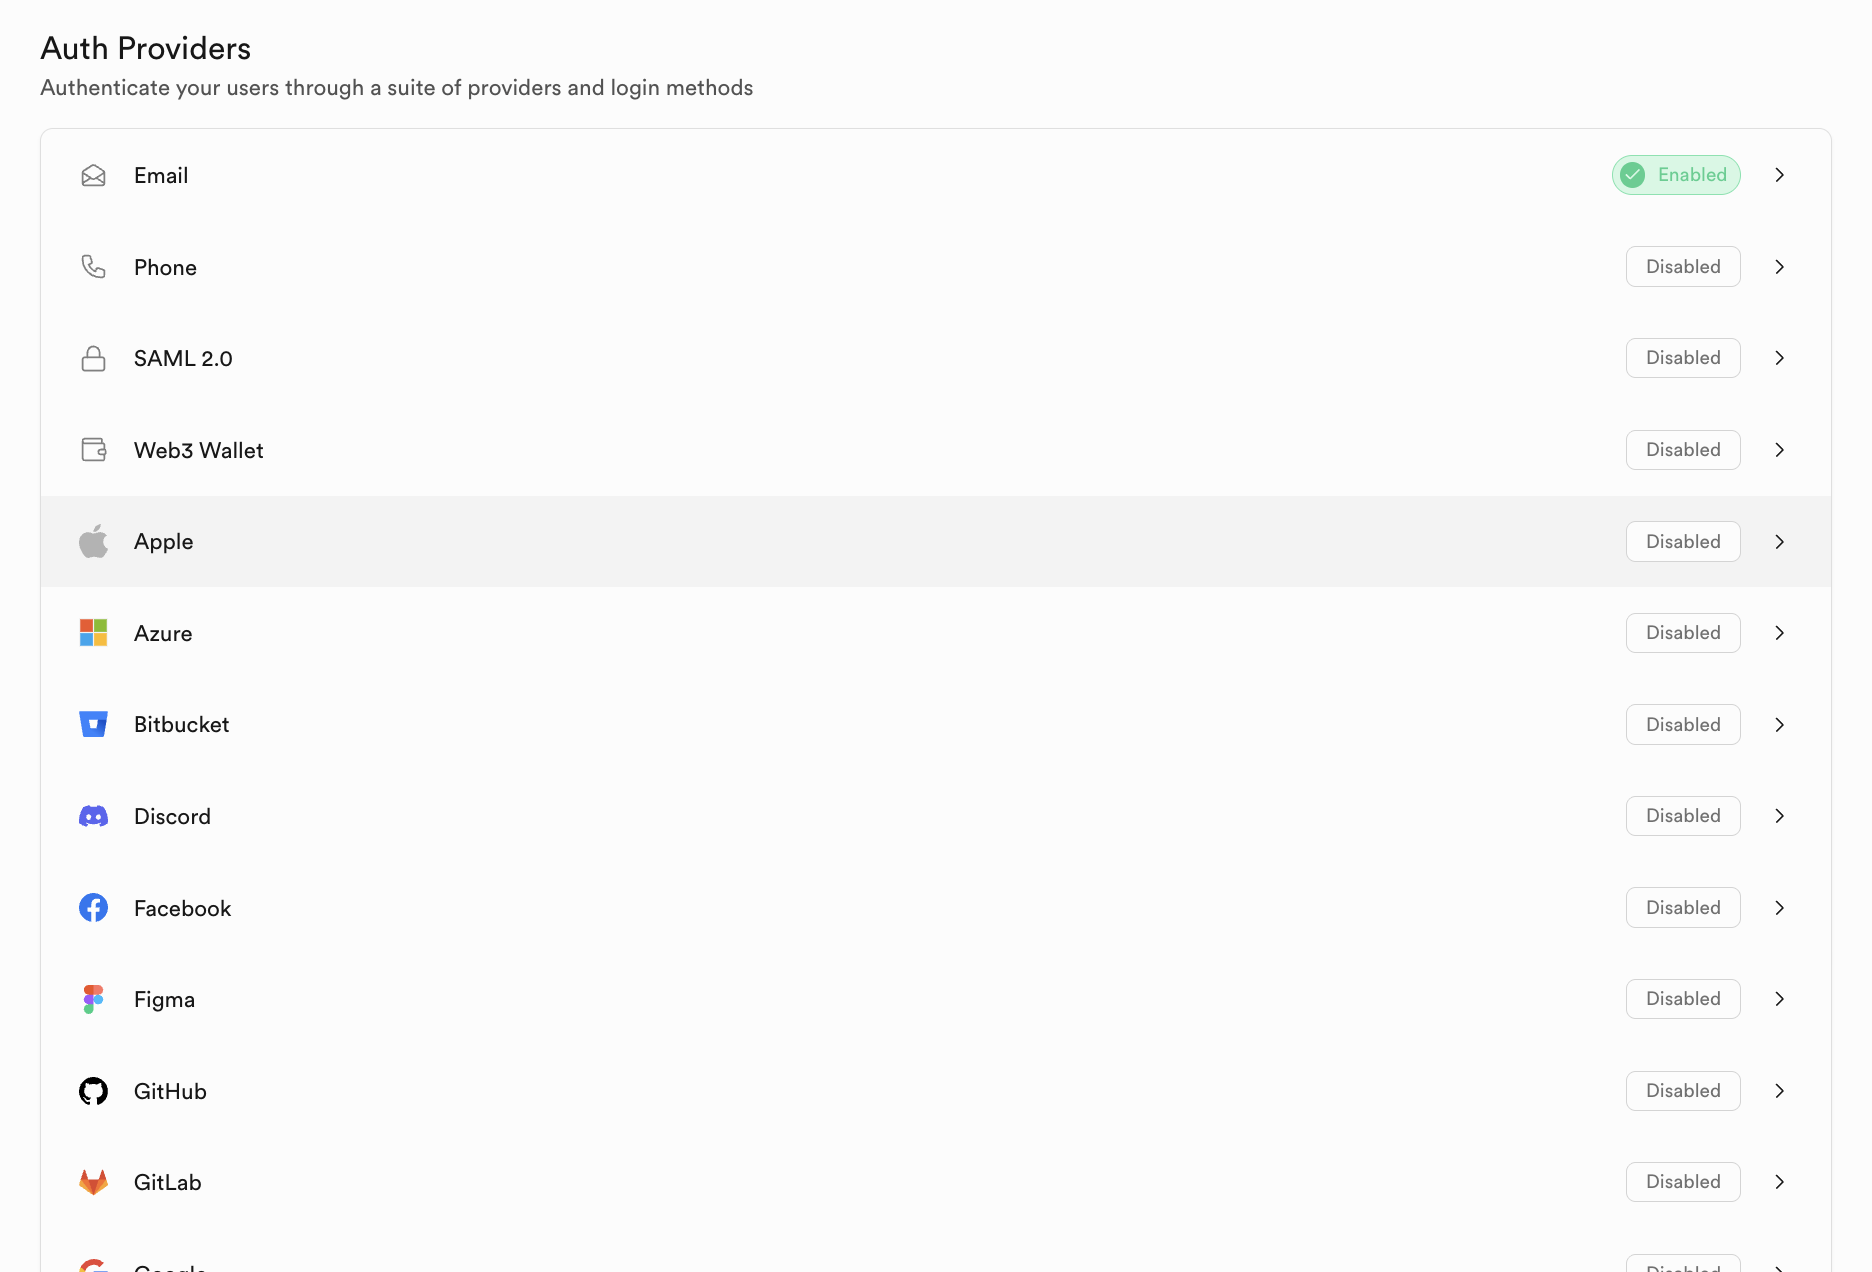
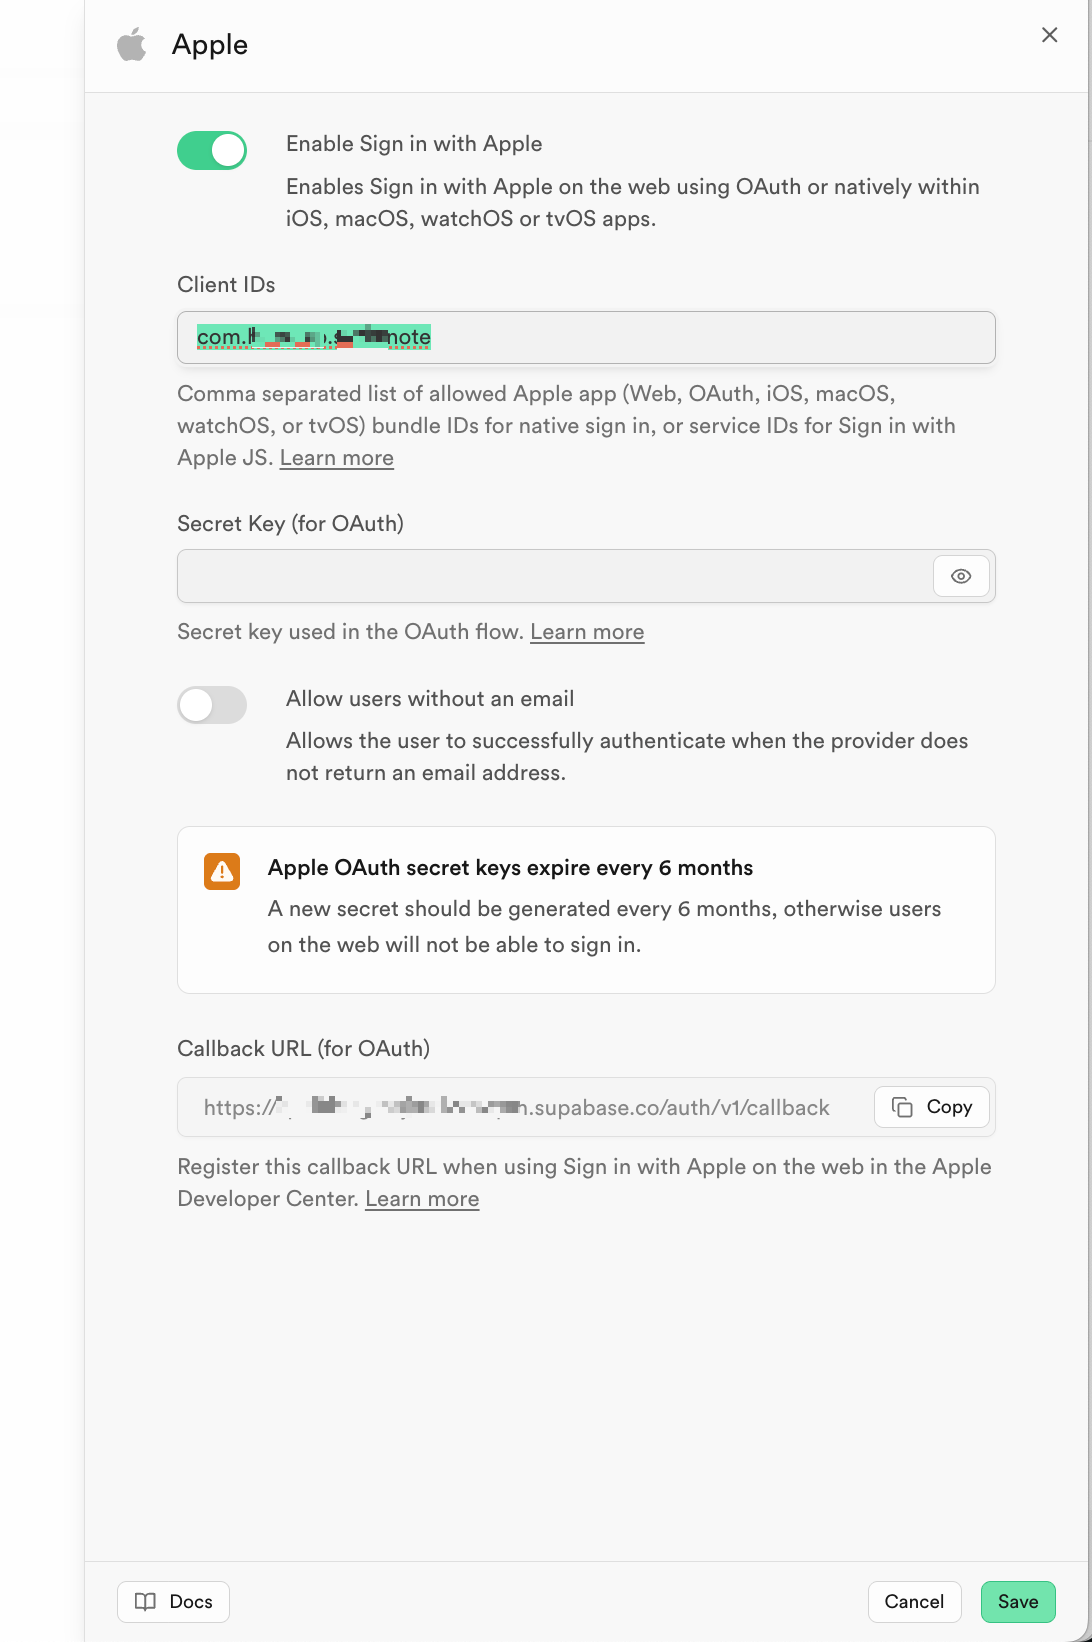
여기서 Apple을 클릭해 활성화 하고
Client ID 란에 로그인을 구현할 앱의
Bundle ID(com.example.example 형태)를 입력하고
Save 버튼을 눌러준다.

참고로 중간에 이 부분은
email 주소 공유하지 않아도
로그인 할 수 있게 해줄지 말지 선택하는 건데
각자 서비스 정책에 따라 설정해주면 된다.
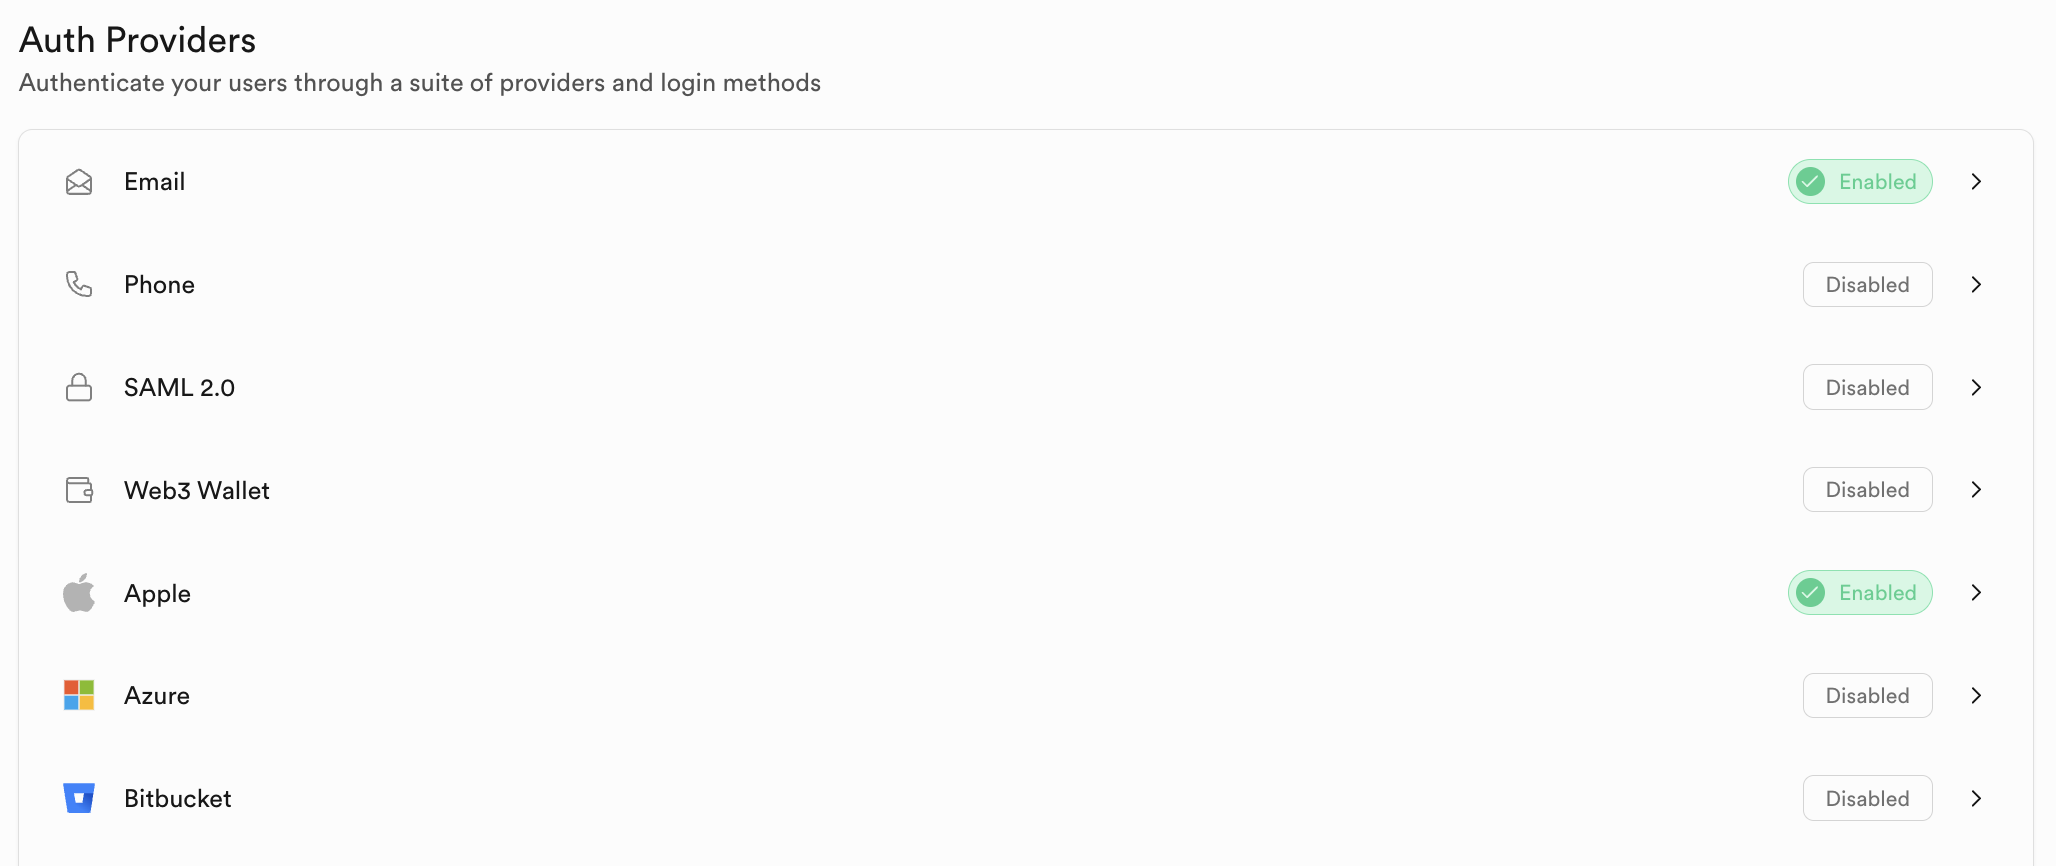
내가 1차적으로 헷갈렸던 것이
여기에 있는 입력필드들과 Callback URL 등인데,
결과적으로 말하면
iOS 네이티브 개발을 하면서 apple 로그인을 구현하는 거면
Client ID만 보면 된다.
앞에 첨부했던 공식문서에 보면
아래와 같이 안내하고 있다.
To support Sign in with Apple, you need to configure the Apple provider in the Supabase dashboard for your project.
There are three general ways to use Sign in with Apple, depending on the application you're trying to build:
- Sign in on the web or in web-based apps
- Using an OAuth flow initiated by Supabase Auth using the Sign in with Apple REST API.
- Using Sign in with Apple JS directly in the browser, usually suitable for websites.
- Sign in natively inside iOS, macOS, watchOS or tvOS apps using Apple's Authentication Services
첫 문장이 방금 우리가 한 provider 활성화다.
네이티브가 아니고 web이나 web 기반 앱은
Sign in with Apple REST API를 사용하는 'OAuth Flow' 나
'Sign in with Apple JS'를 이용하게 되고
네이티브 앱의 경우에는 Apple 의 Authentication Service를 사용한다고 되어 있다.
우리의 케이스는 마지막 문장에 해당하므로
OAuth Flow와 관련이 없다는 점이 중요하다.
Provider 설정하는 곳을 다시 보면
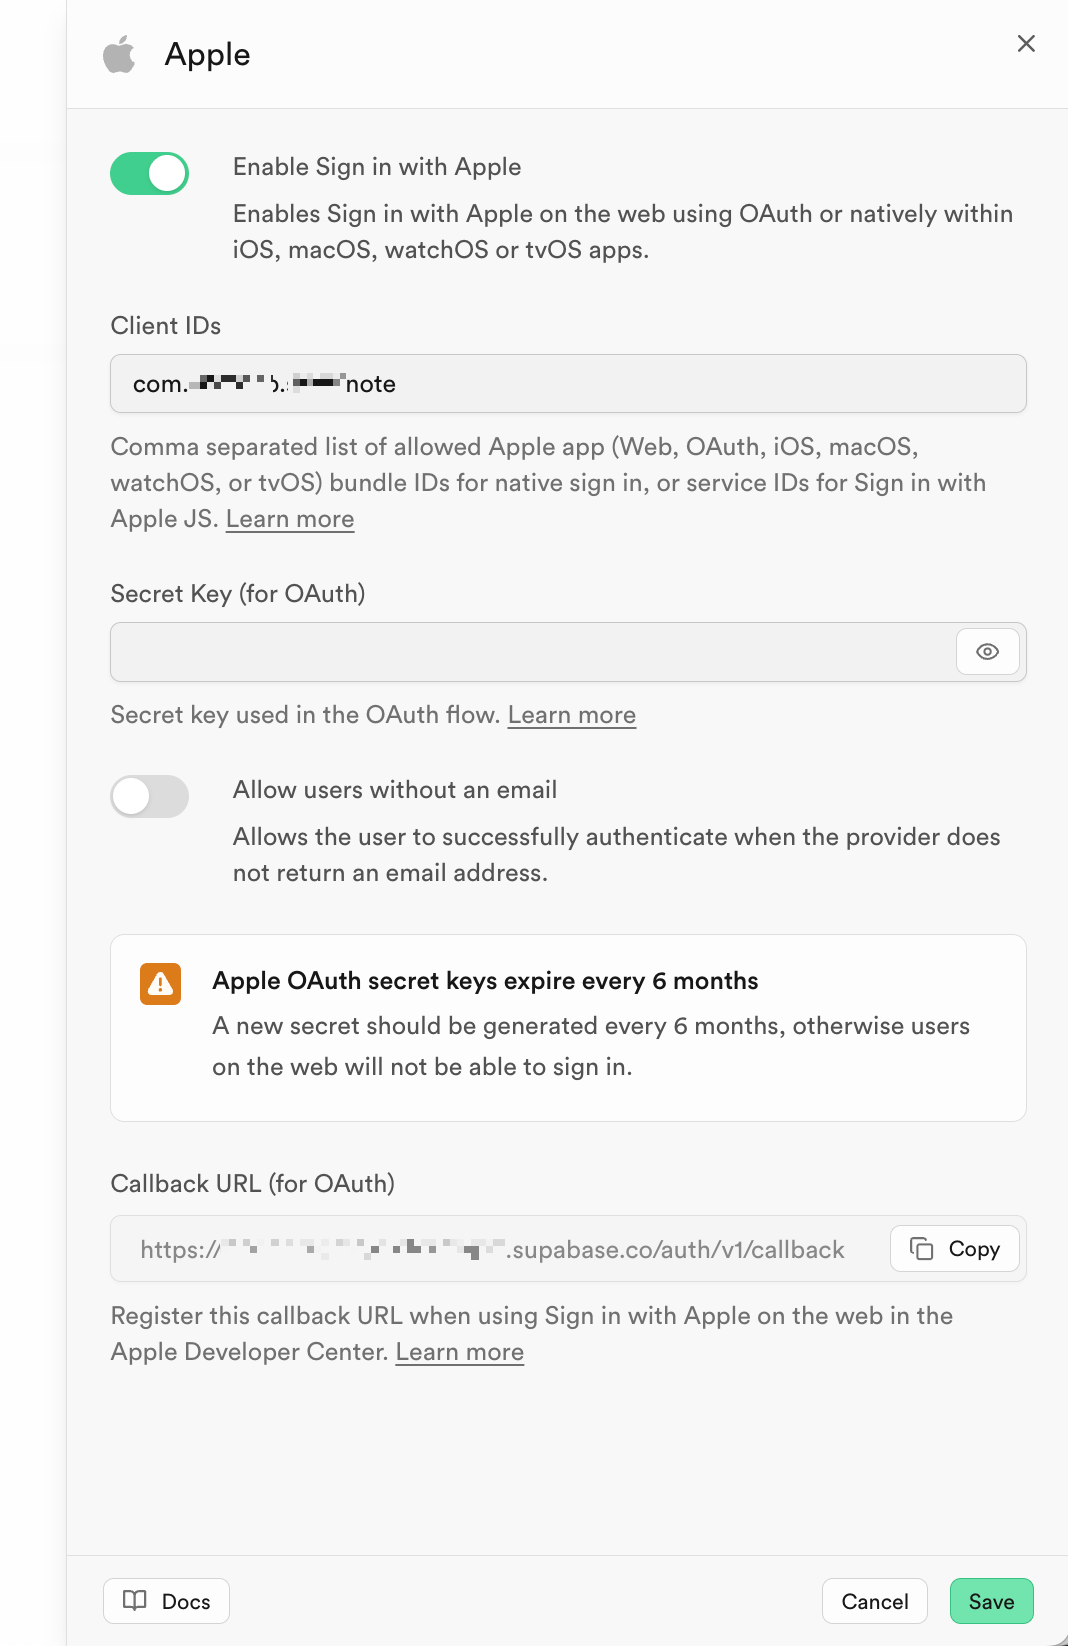
Client ID에 'native sign in을 위해서는 bundle ID를 입력하라' 고 되어 있고
Apple JS로 로그인할 때는 service ID를 입력하라고 되어 있다.
근데 다른 블로그나 유튜브 등에서는 네이티브인데도
service ID를 생성하는 과정이 있어서 헷갈렸던 부분..
그리고 Secret Key와 Callback URL의 경우에도
모두 OAuth flow를 위한 내용들이기 때문에
네이티브 로그인을 구현하는 경우에는 신경쓸 필요가 없다!!
Client ID만 잘 넣어주고 Save 누르면
Supabase Dashboard에서 설정할 건 끝난다.
공식문서에 Secert Key에 대해서 이렇게 적혀있는 것 참고!
OAuth flow에서는 secret key를 6개월마다 갱신해줘야 한다.
하지만 네이티브에서는 secret key 자체를 사용하지 않는다.
If you're using the OAuth flow (web, Flutter web, Kotlin non-iOS platforms), Apple requires you to generate a new secret key every 6 months using the signing key (.p8 file). This is a critical maintenance task that will cause authentication failures if missed.
...
Native-only implementations don't require secret key rotation.
추가로 초반에 날 헷갈리게 했던 것은
이 공식문서였는데,
Build a User Management App with Swift and SwiftUI | Supabase Docs
Learn how to use Supabase in your SwiftUI App.
supabase.com
여기서 보면 앱 스킴도 만들어라고 하고,
redirect URL도 쓰고 막 그런다..
심지어 Claude에서도 Info.plist에 앱스킴 설정해넣으라고 했다.
근데 이건 애플 로그인이 아니라
이메일이랑 비밀번호 넣는 로그인
구현할때 필요한 거라서
네이티브 애플 로그인을 구현하는 지금은
신경쓸 필요가 없는 거였다!!
2. Xcode에서 Supabase Package Dependency 추가
참고 공식 문서: https://supabase.com/docs/reference/swift/introduction
Swift: Introduction | Supabase Docs
supabase.com
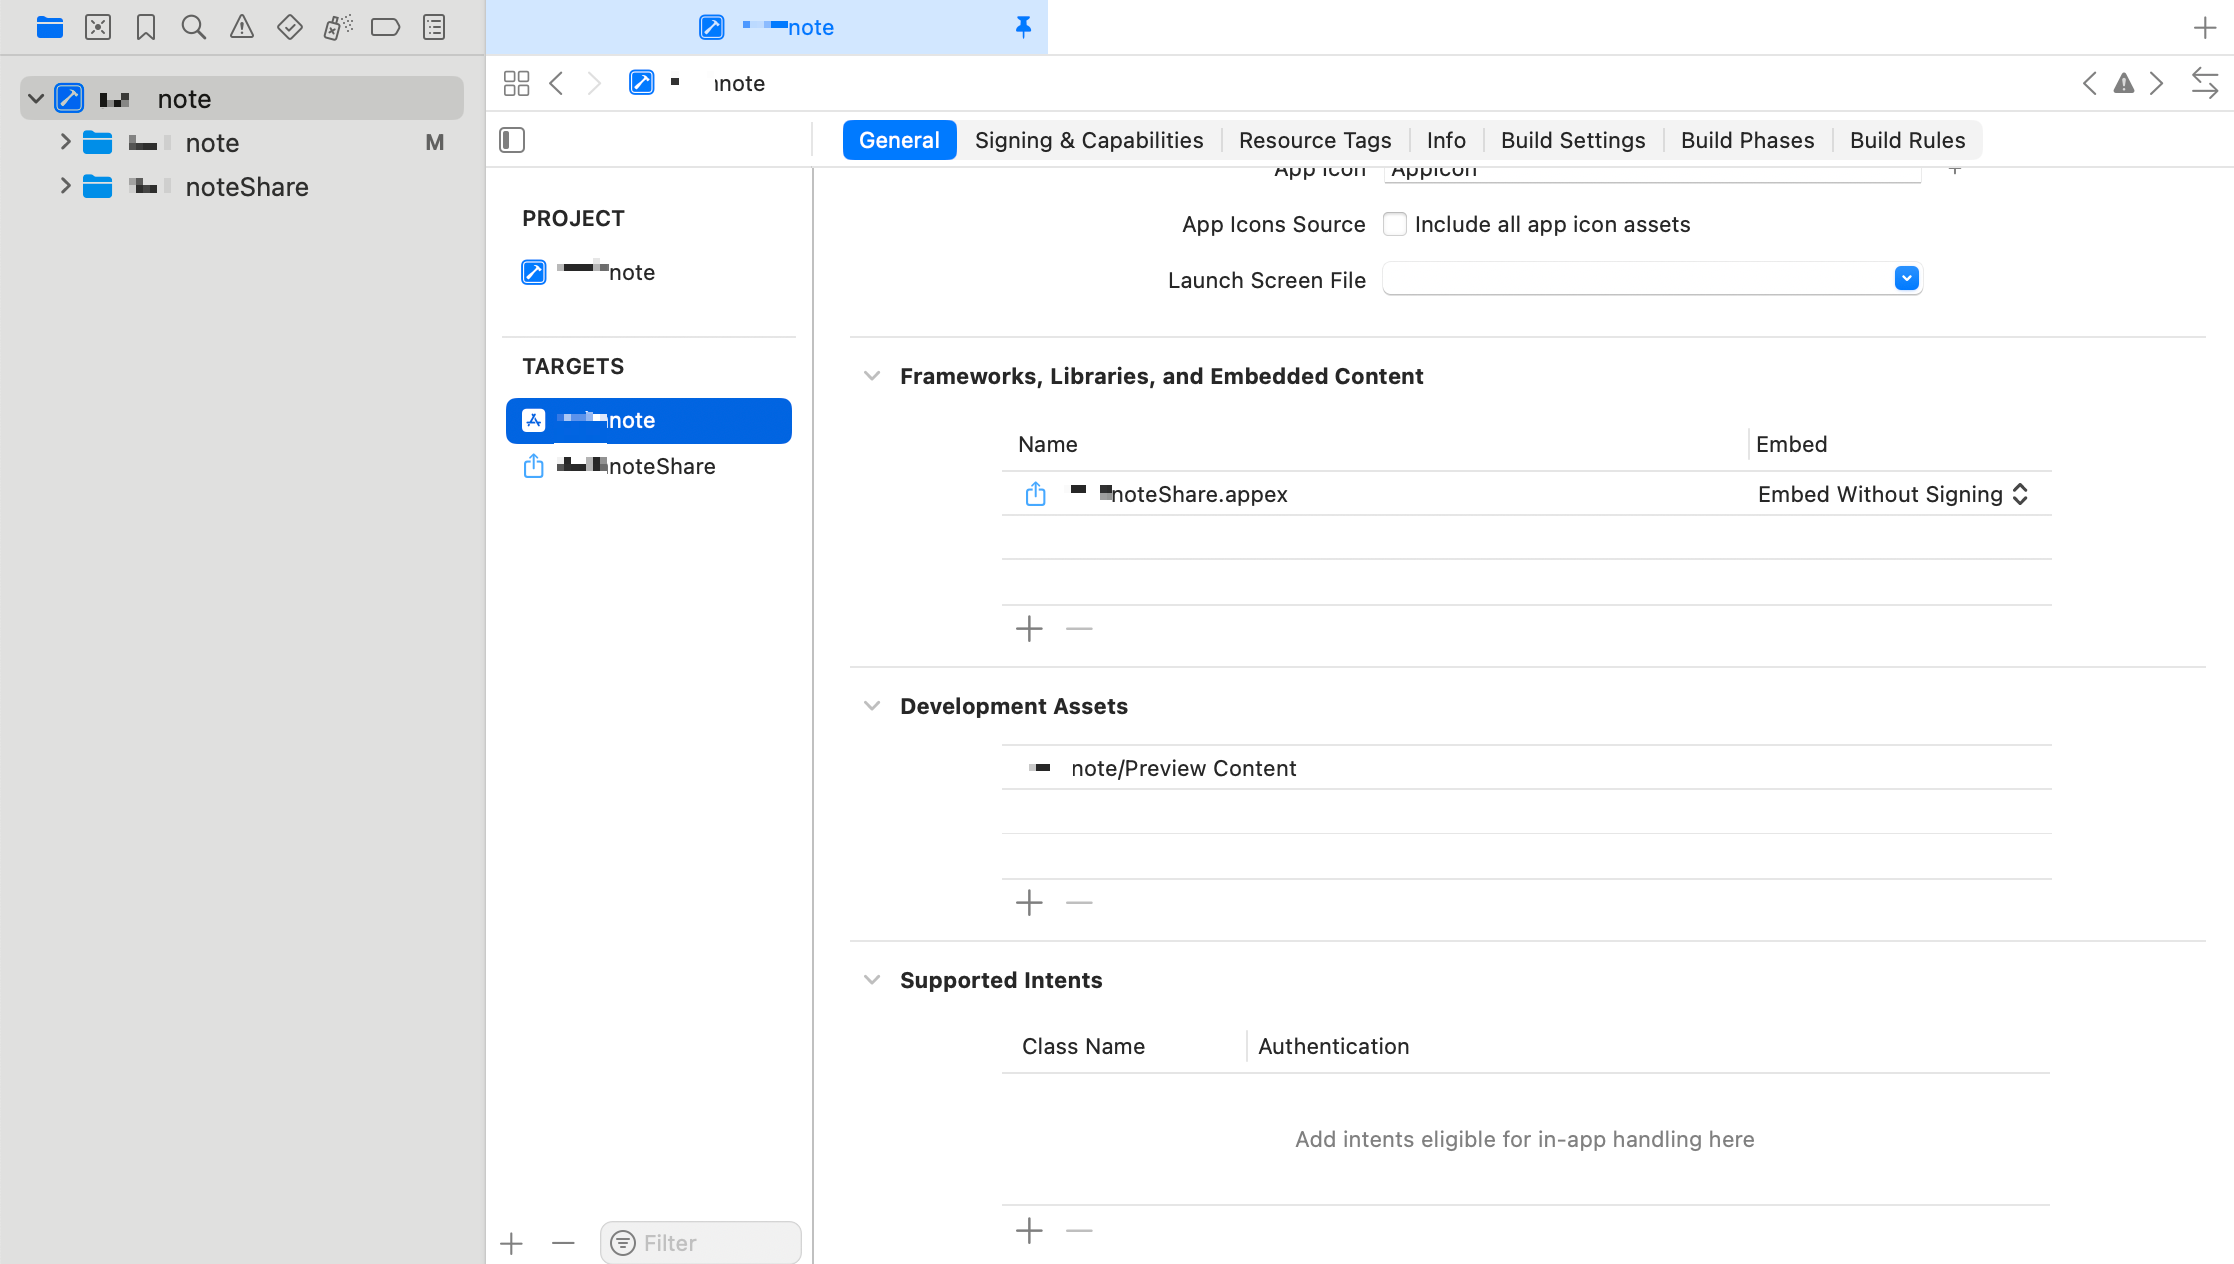
Xcode 내에서 프로젝트를 누르면
설정창이 나오는데,
Target에서 앱 이름 선택 > General 클릭
Frameworks, Libraries, and Embedded Content 부분으로 스크롤을 내린다.
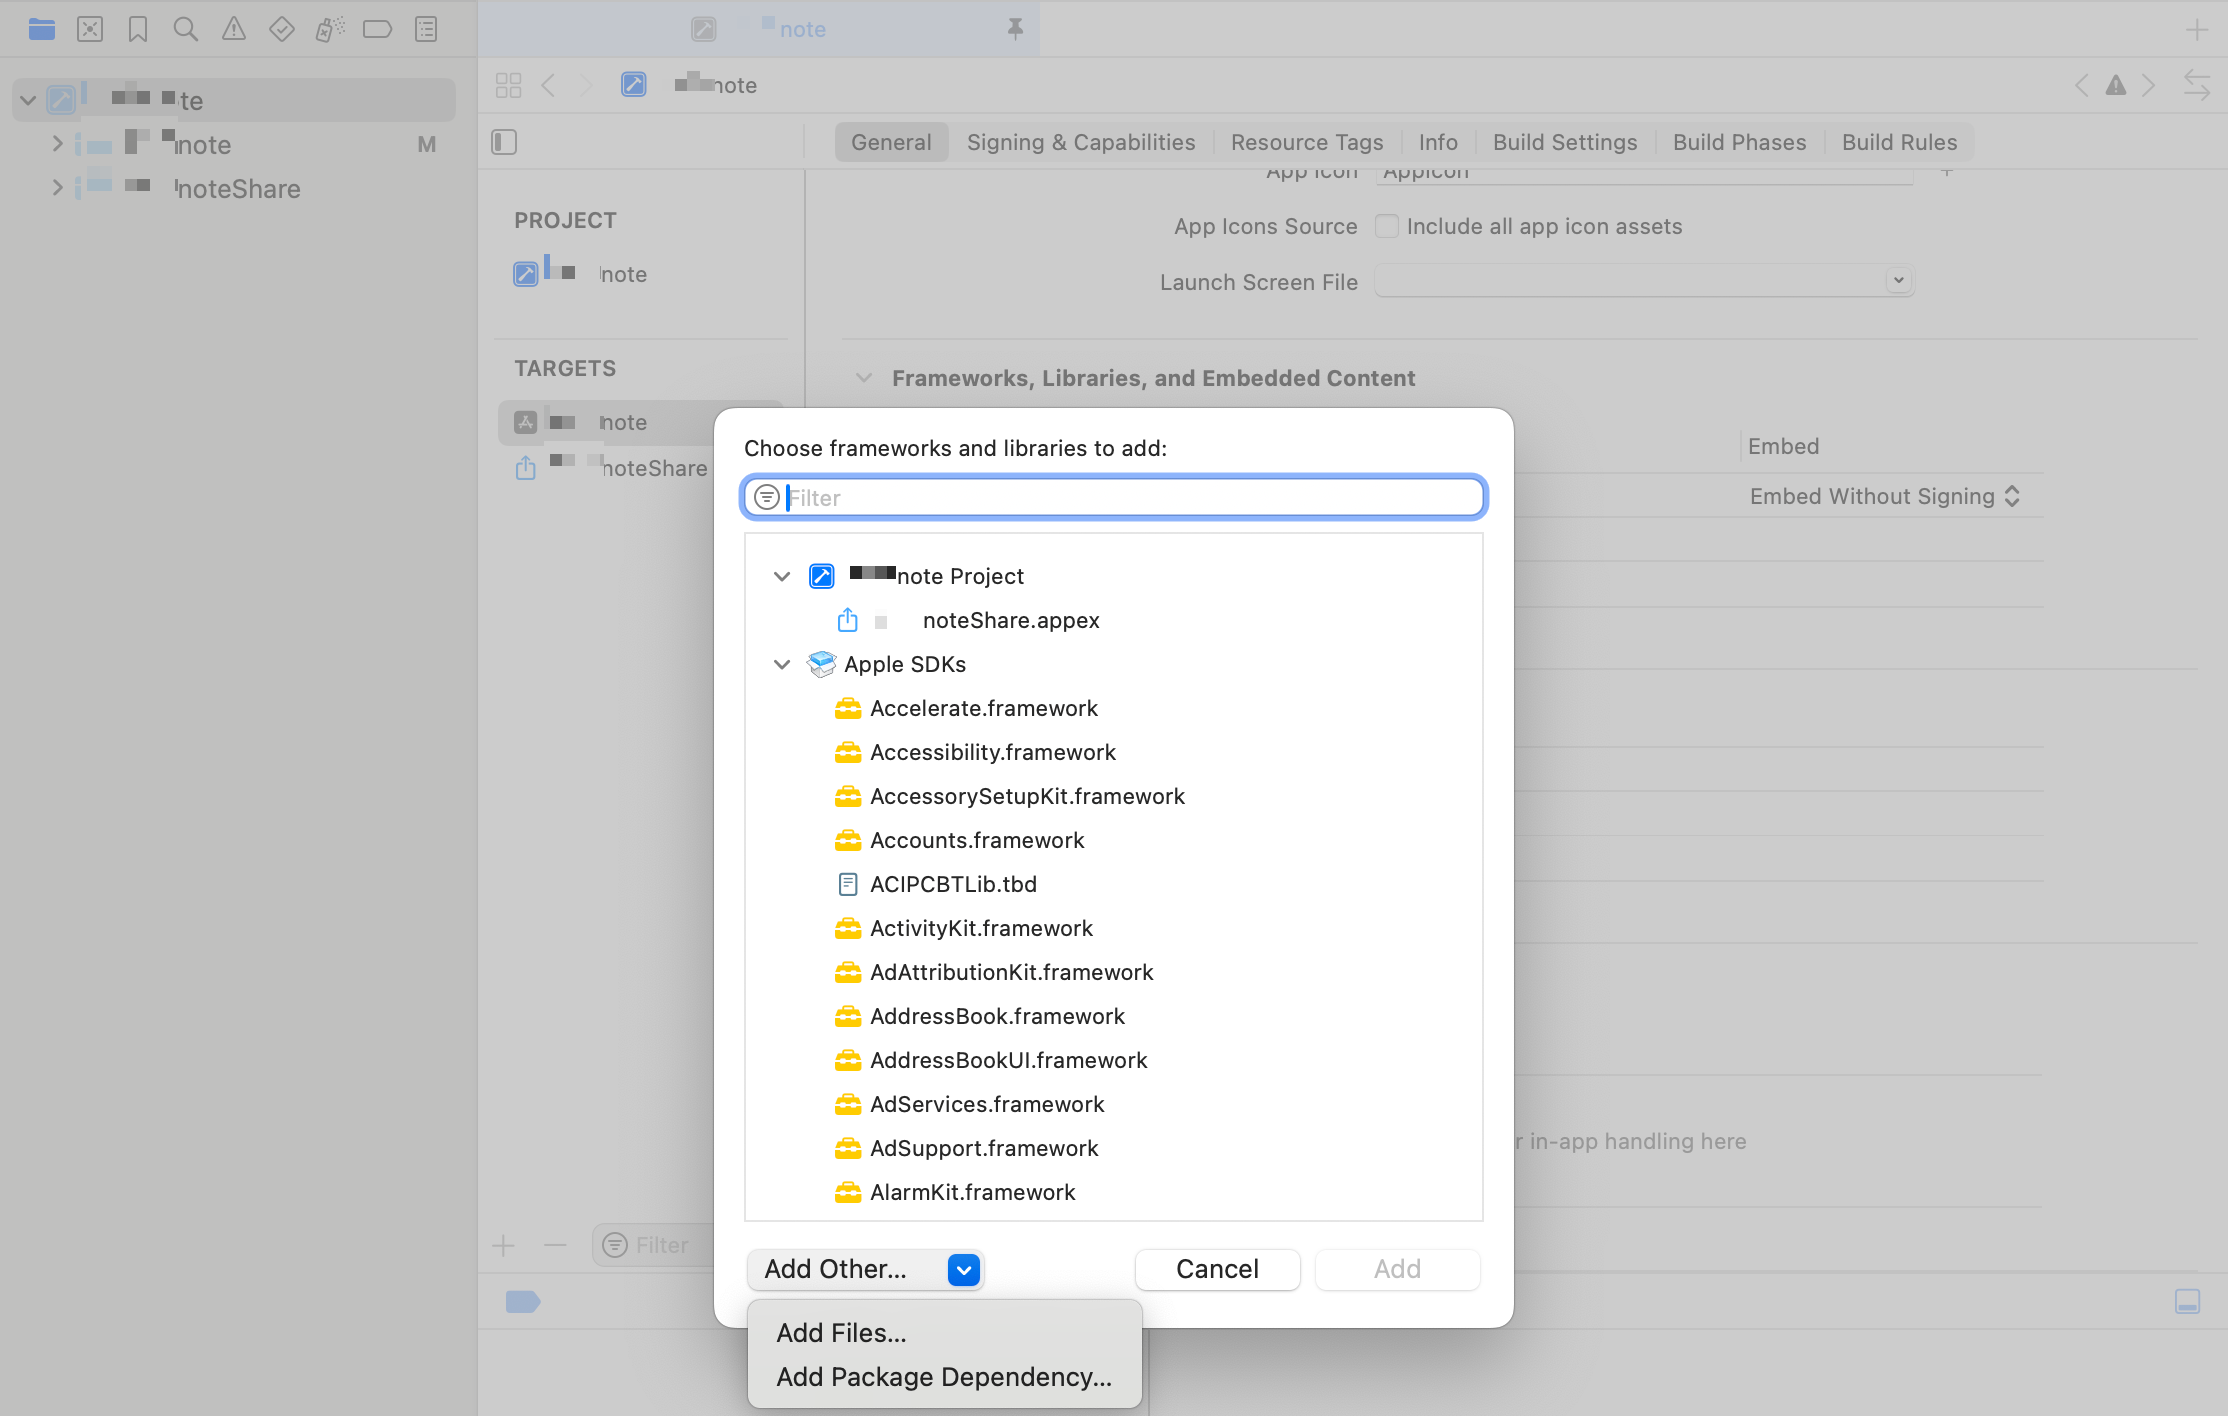
Frameworks, Libraries, and Embedded Content 에서
+ 버튼을 누르면 이렇게 뜨는데
Add Others 클릭하고
Add Package Dependency... 를 클릭
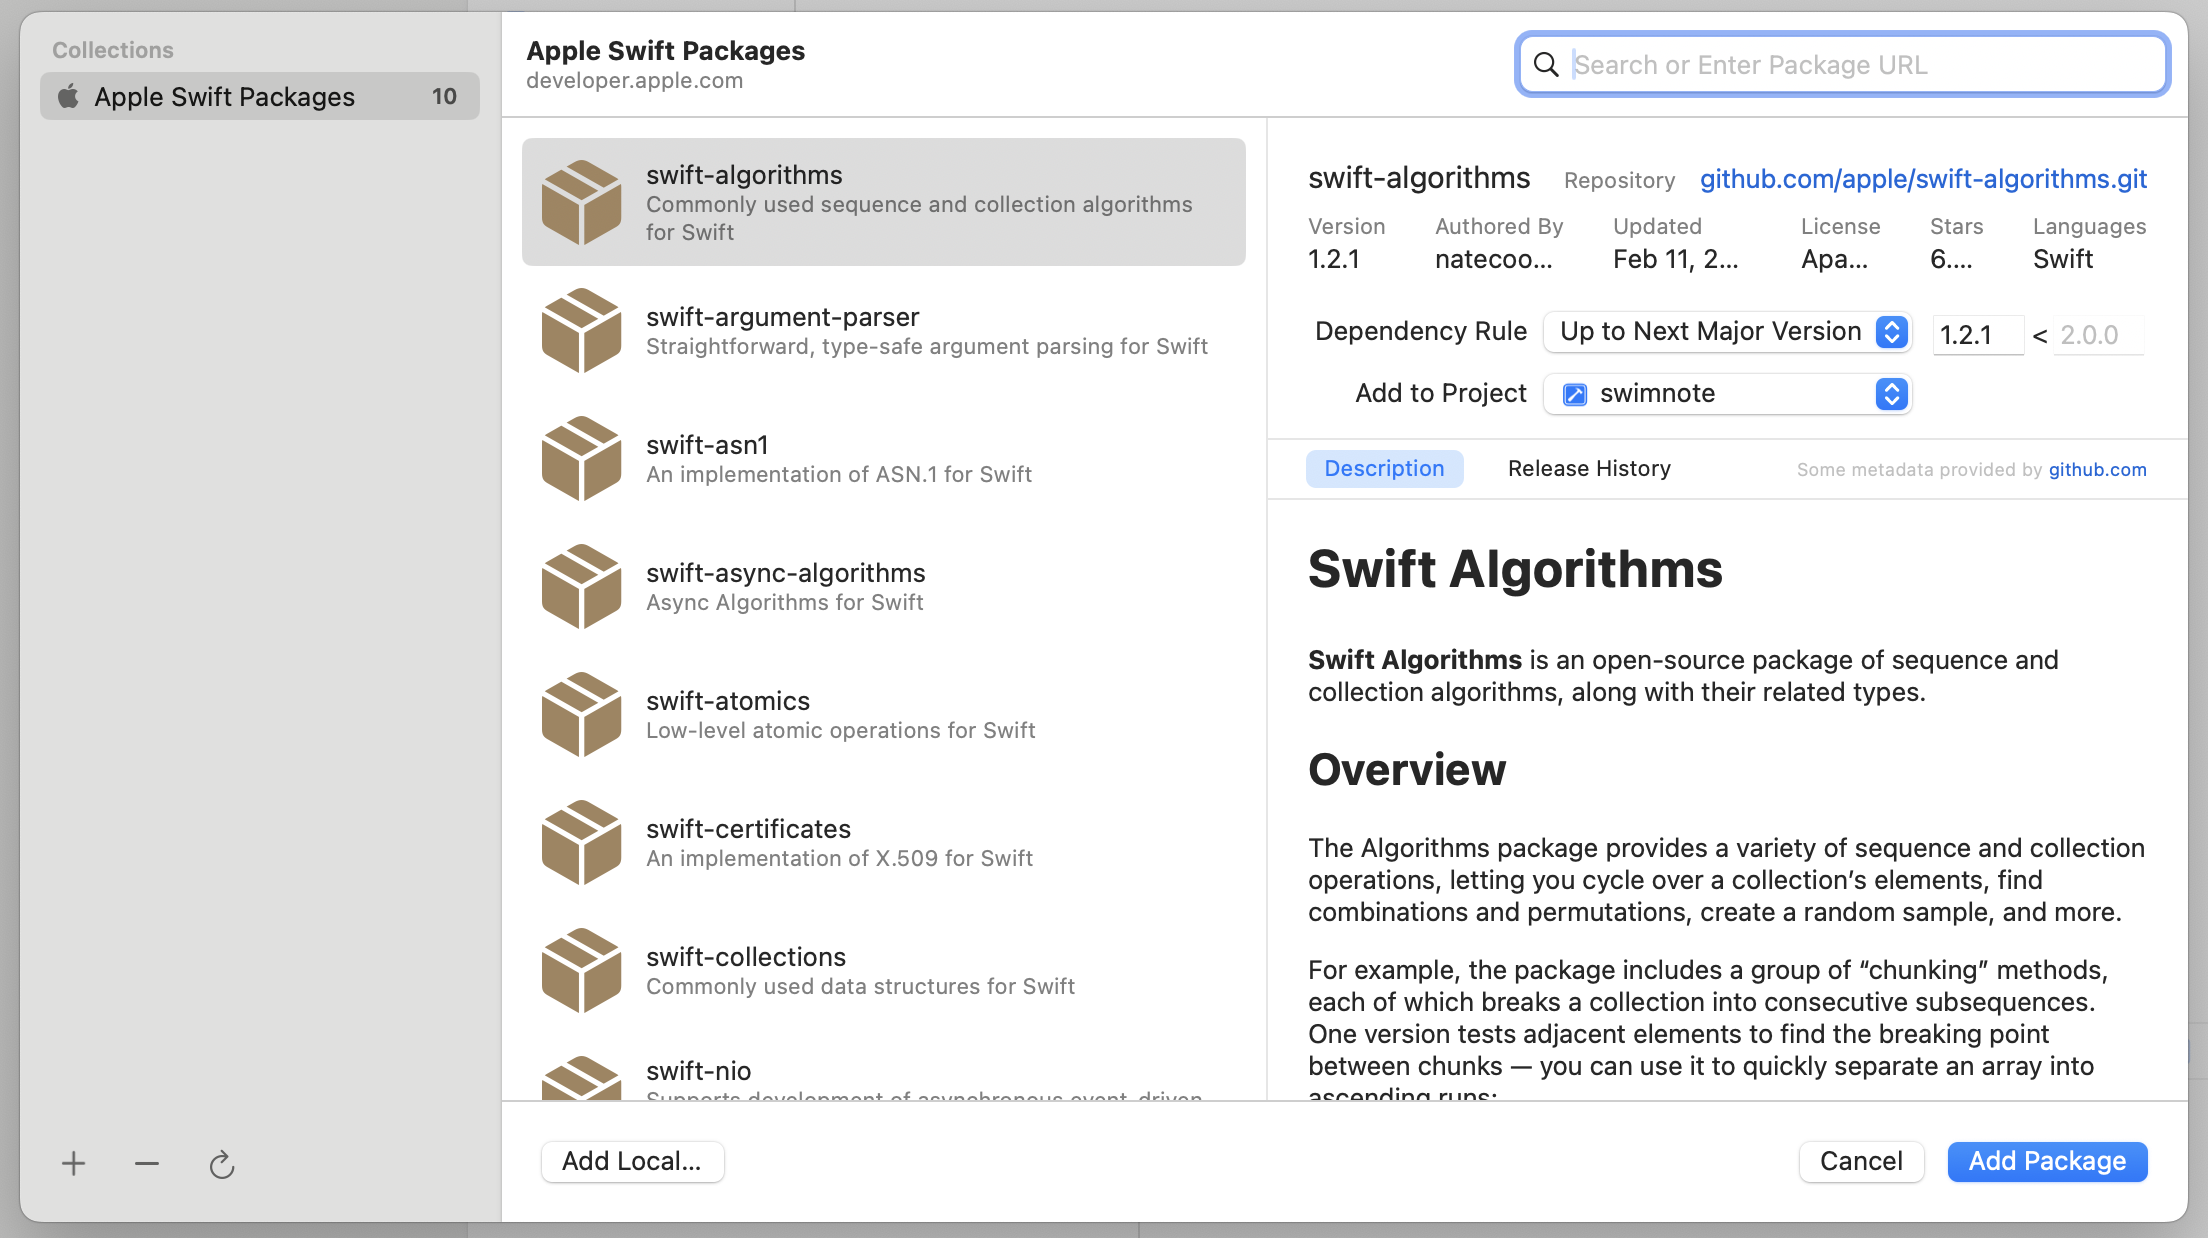
상단 오른쪽 검색창에 https://github.com/supabase-community/supabase-swift.git 입력
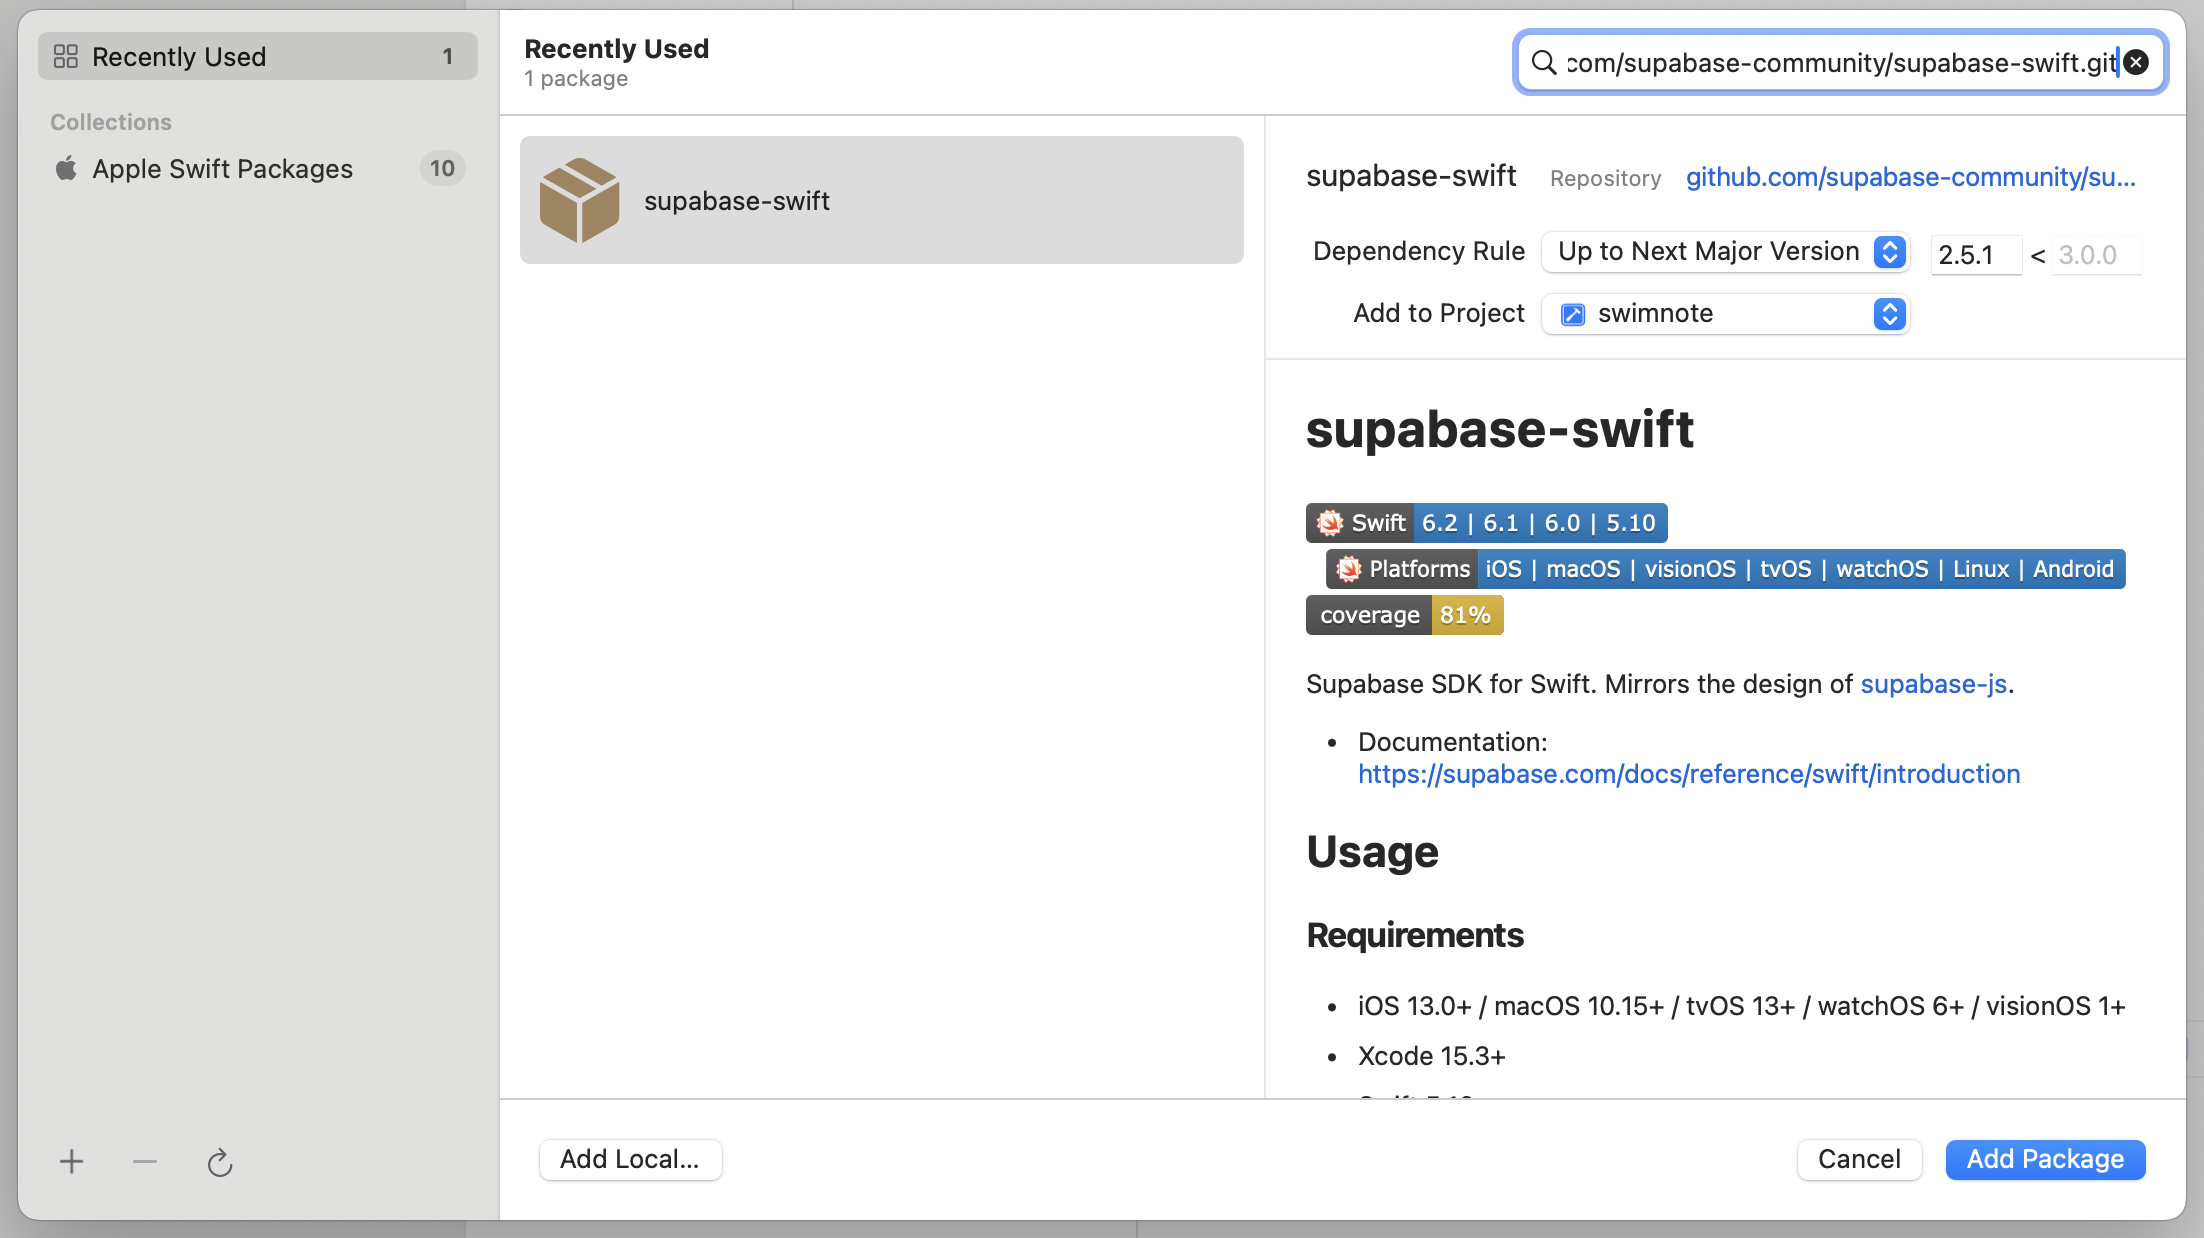
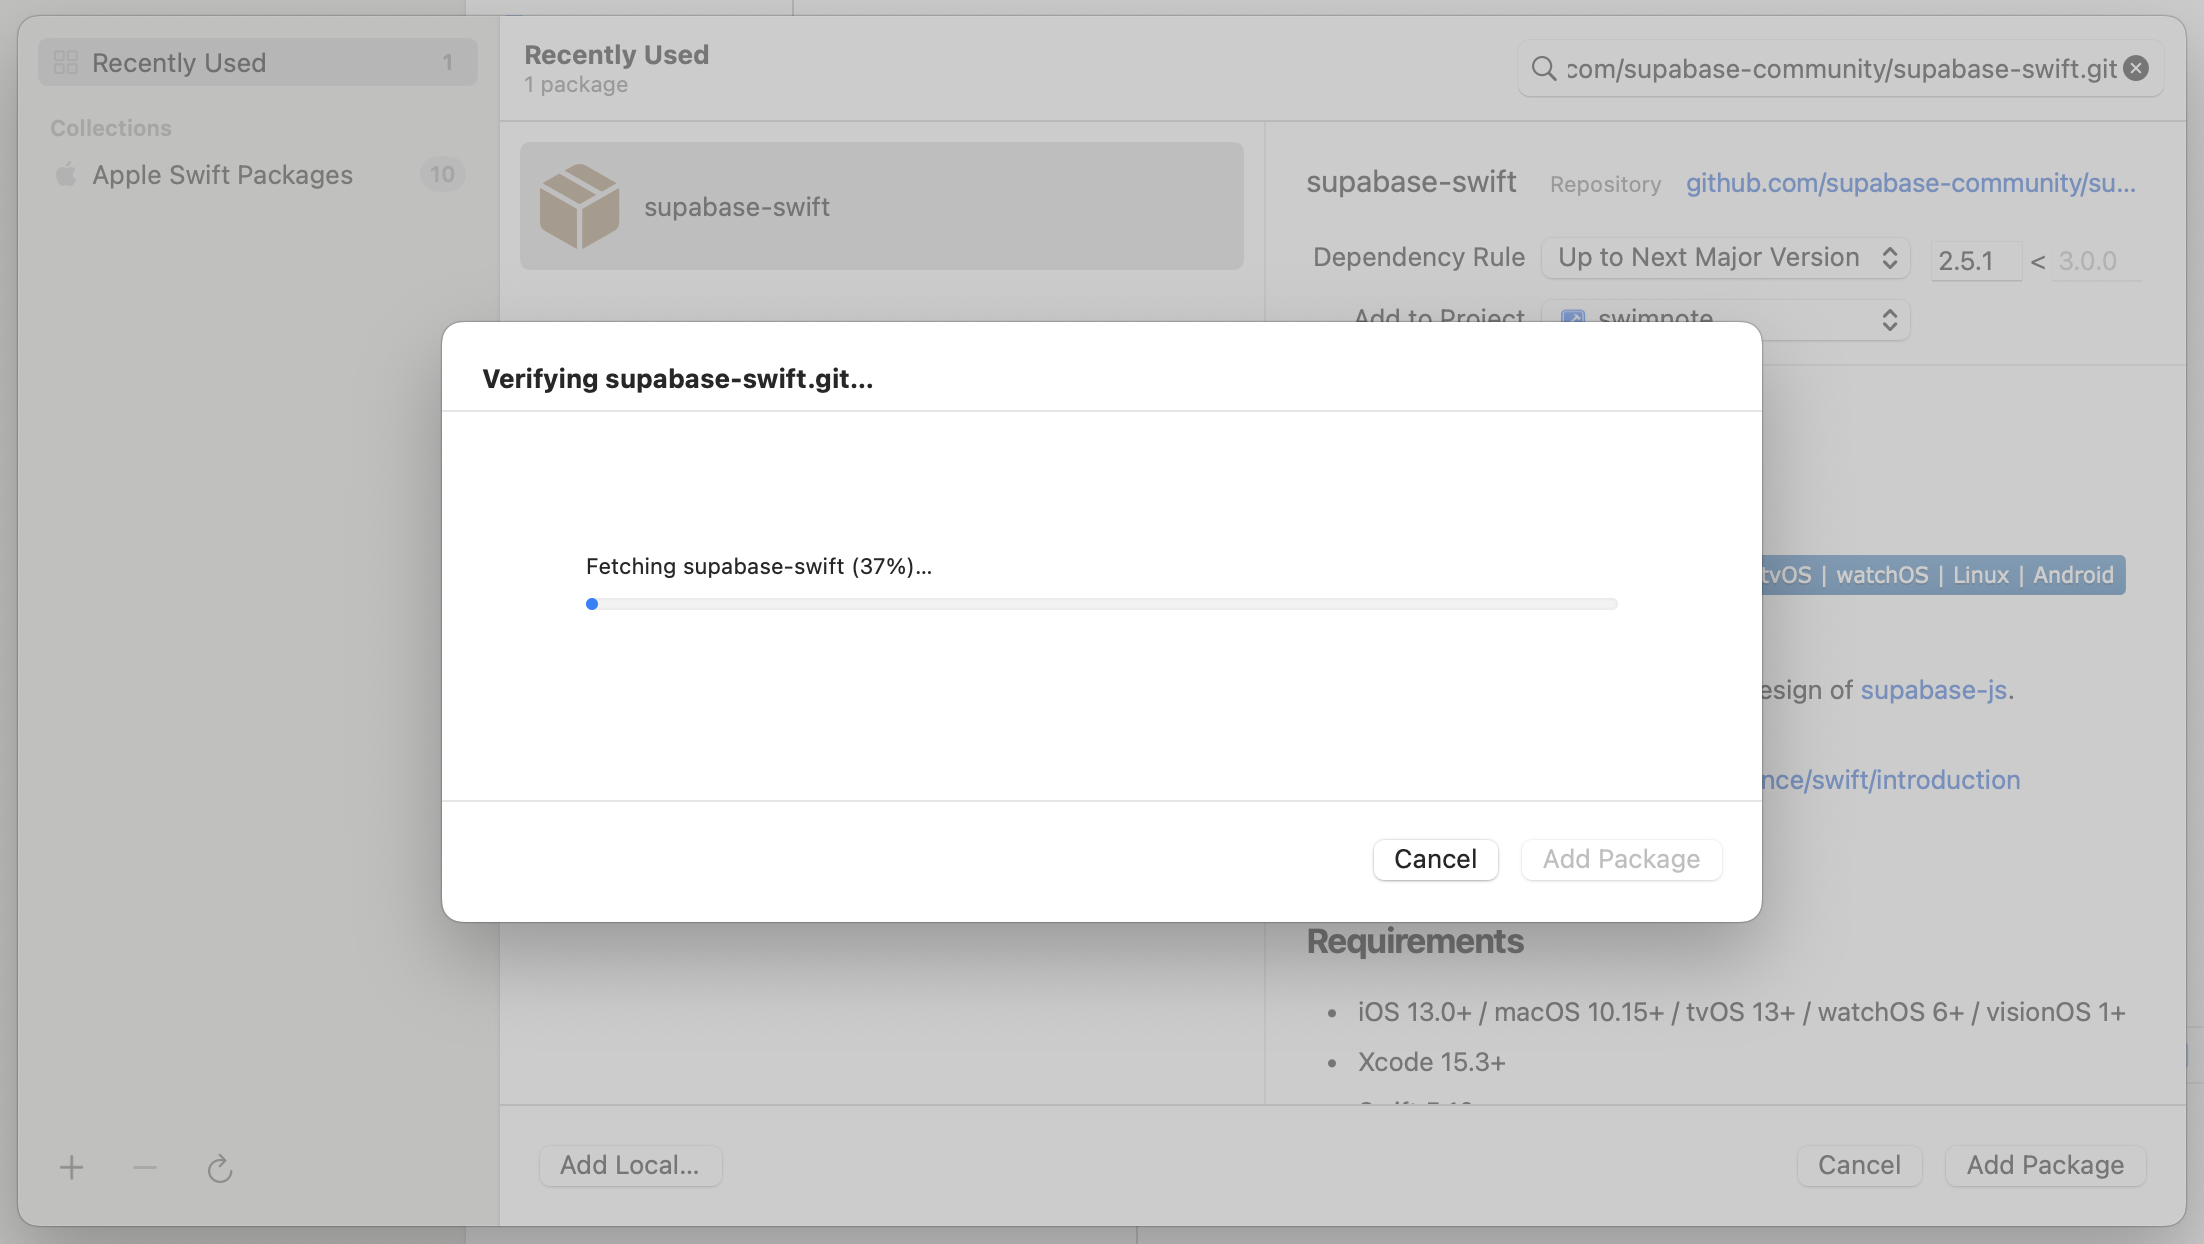
supabase-swift가 검색 결과로 나오면
Add Package 버튼 누르기!
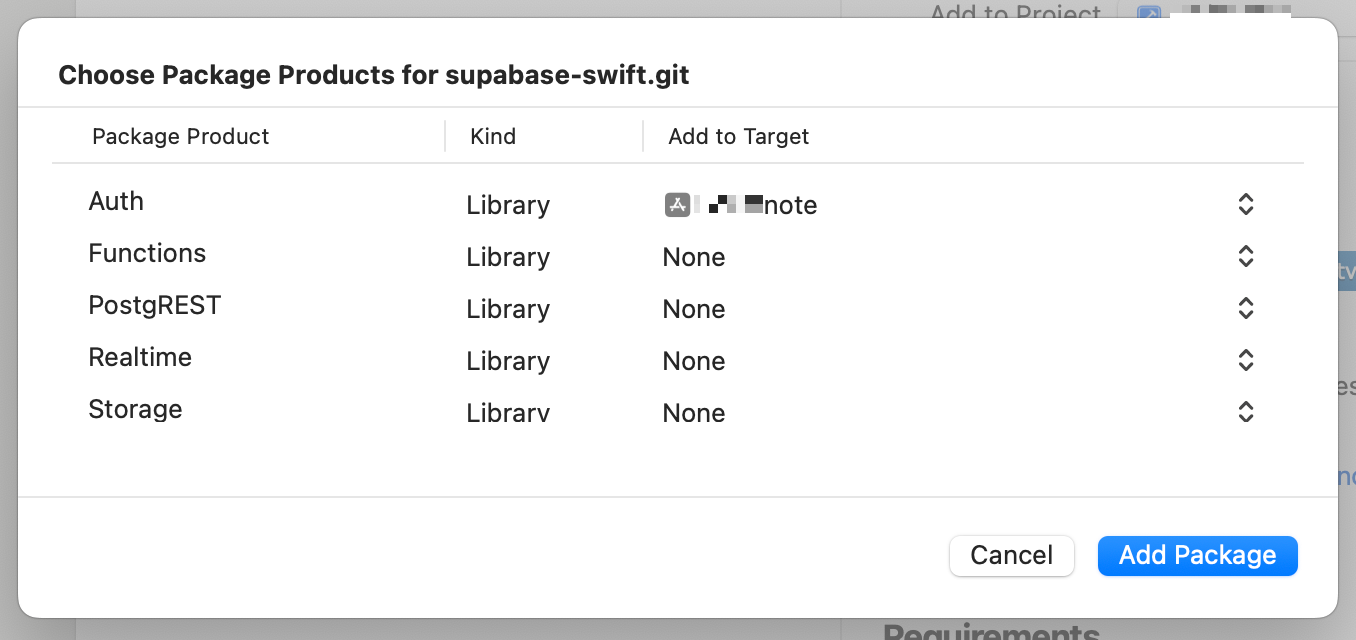
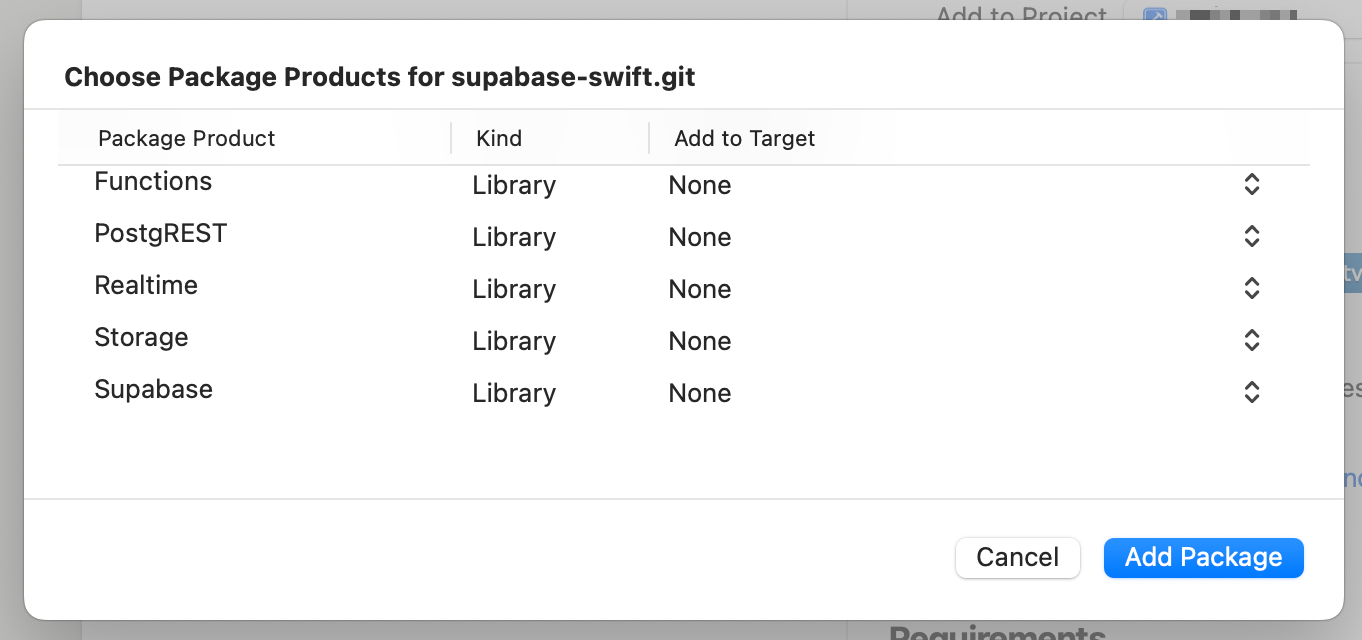
그럼 이렇게 패키지를 선택하는 창이 나오는데,
스크롤을 내리면 있는 Supabase로
서비스를 전체 설치할 수도 있고
Auth, Functions, Storage ... 등등 중에서
원하는 서비스만 추가할 수도 있다.
Add to Target 에서는 원하는 것을 선택한다.
여러 서비스를 다 쓸 거면 Supabase를 선택하면 되지만
지금은 로그인 구현만 할 것이기 때문에
Auth만 일단 설치해보겠다.
Auth만 설치하니 코드에서 import 할 Supabase를 찾을 수 없다고 떴다.
다른 서비스 없이 Auth만 설치하더라도 스크롤을 내려
Supabase도 같이 타겟에 추가해주어야 한다.
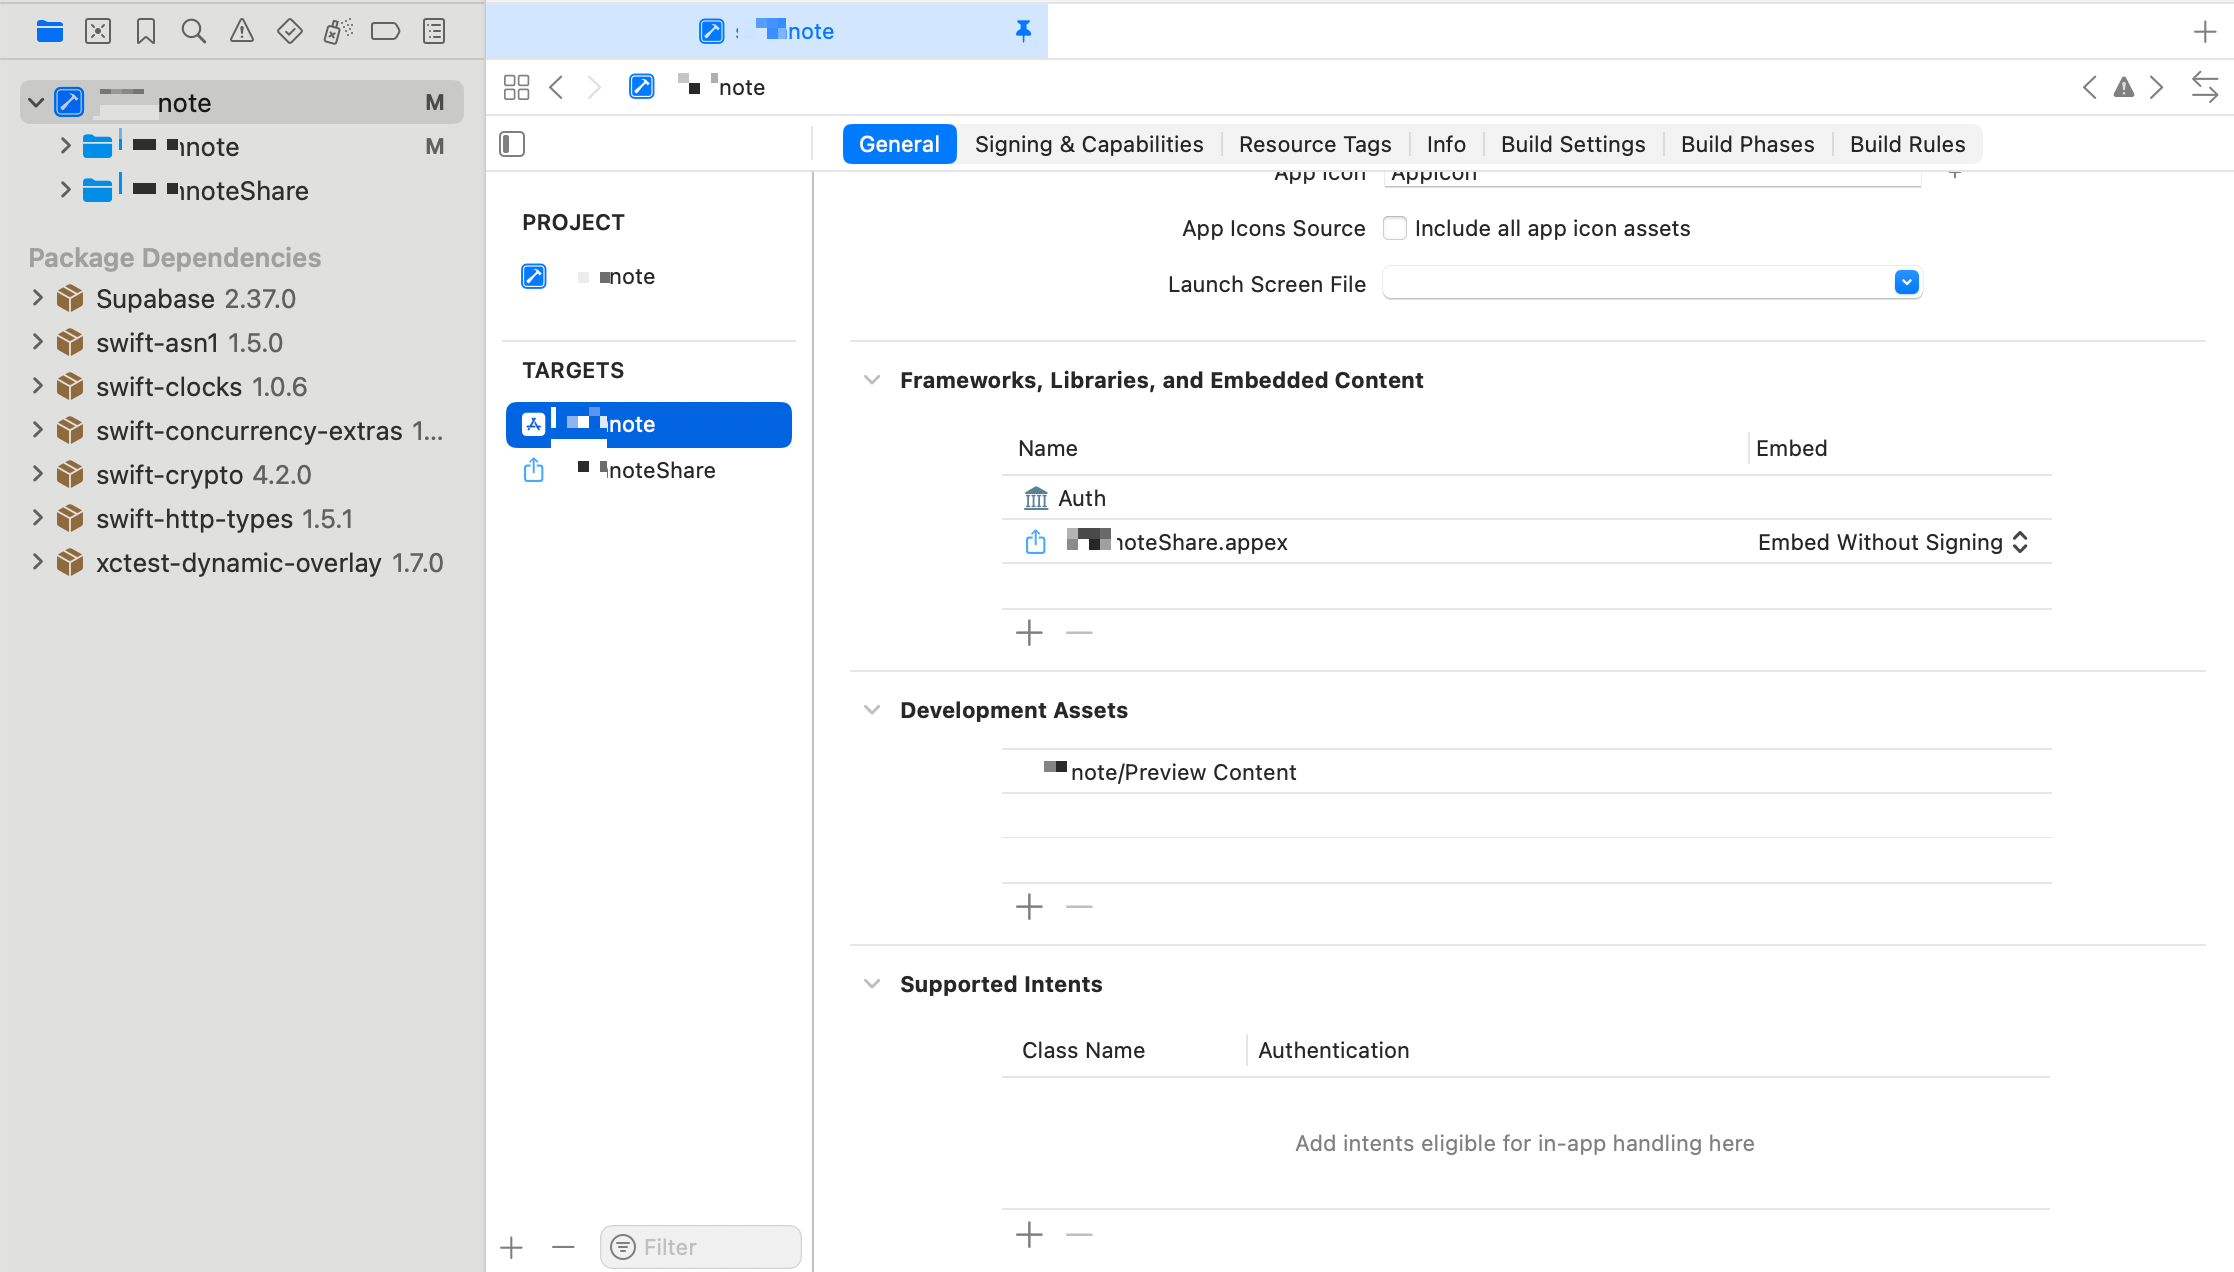
그럼 이렇게 Auth가 추가된 것을 볼 수 있다!
3. Xcode에서 Sign in with Apple Capability 추가하기
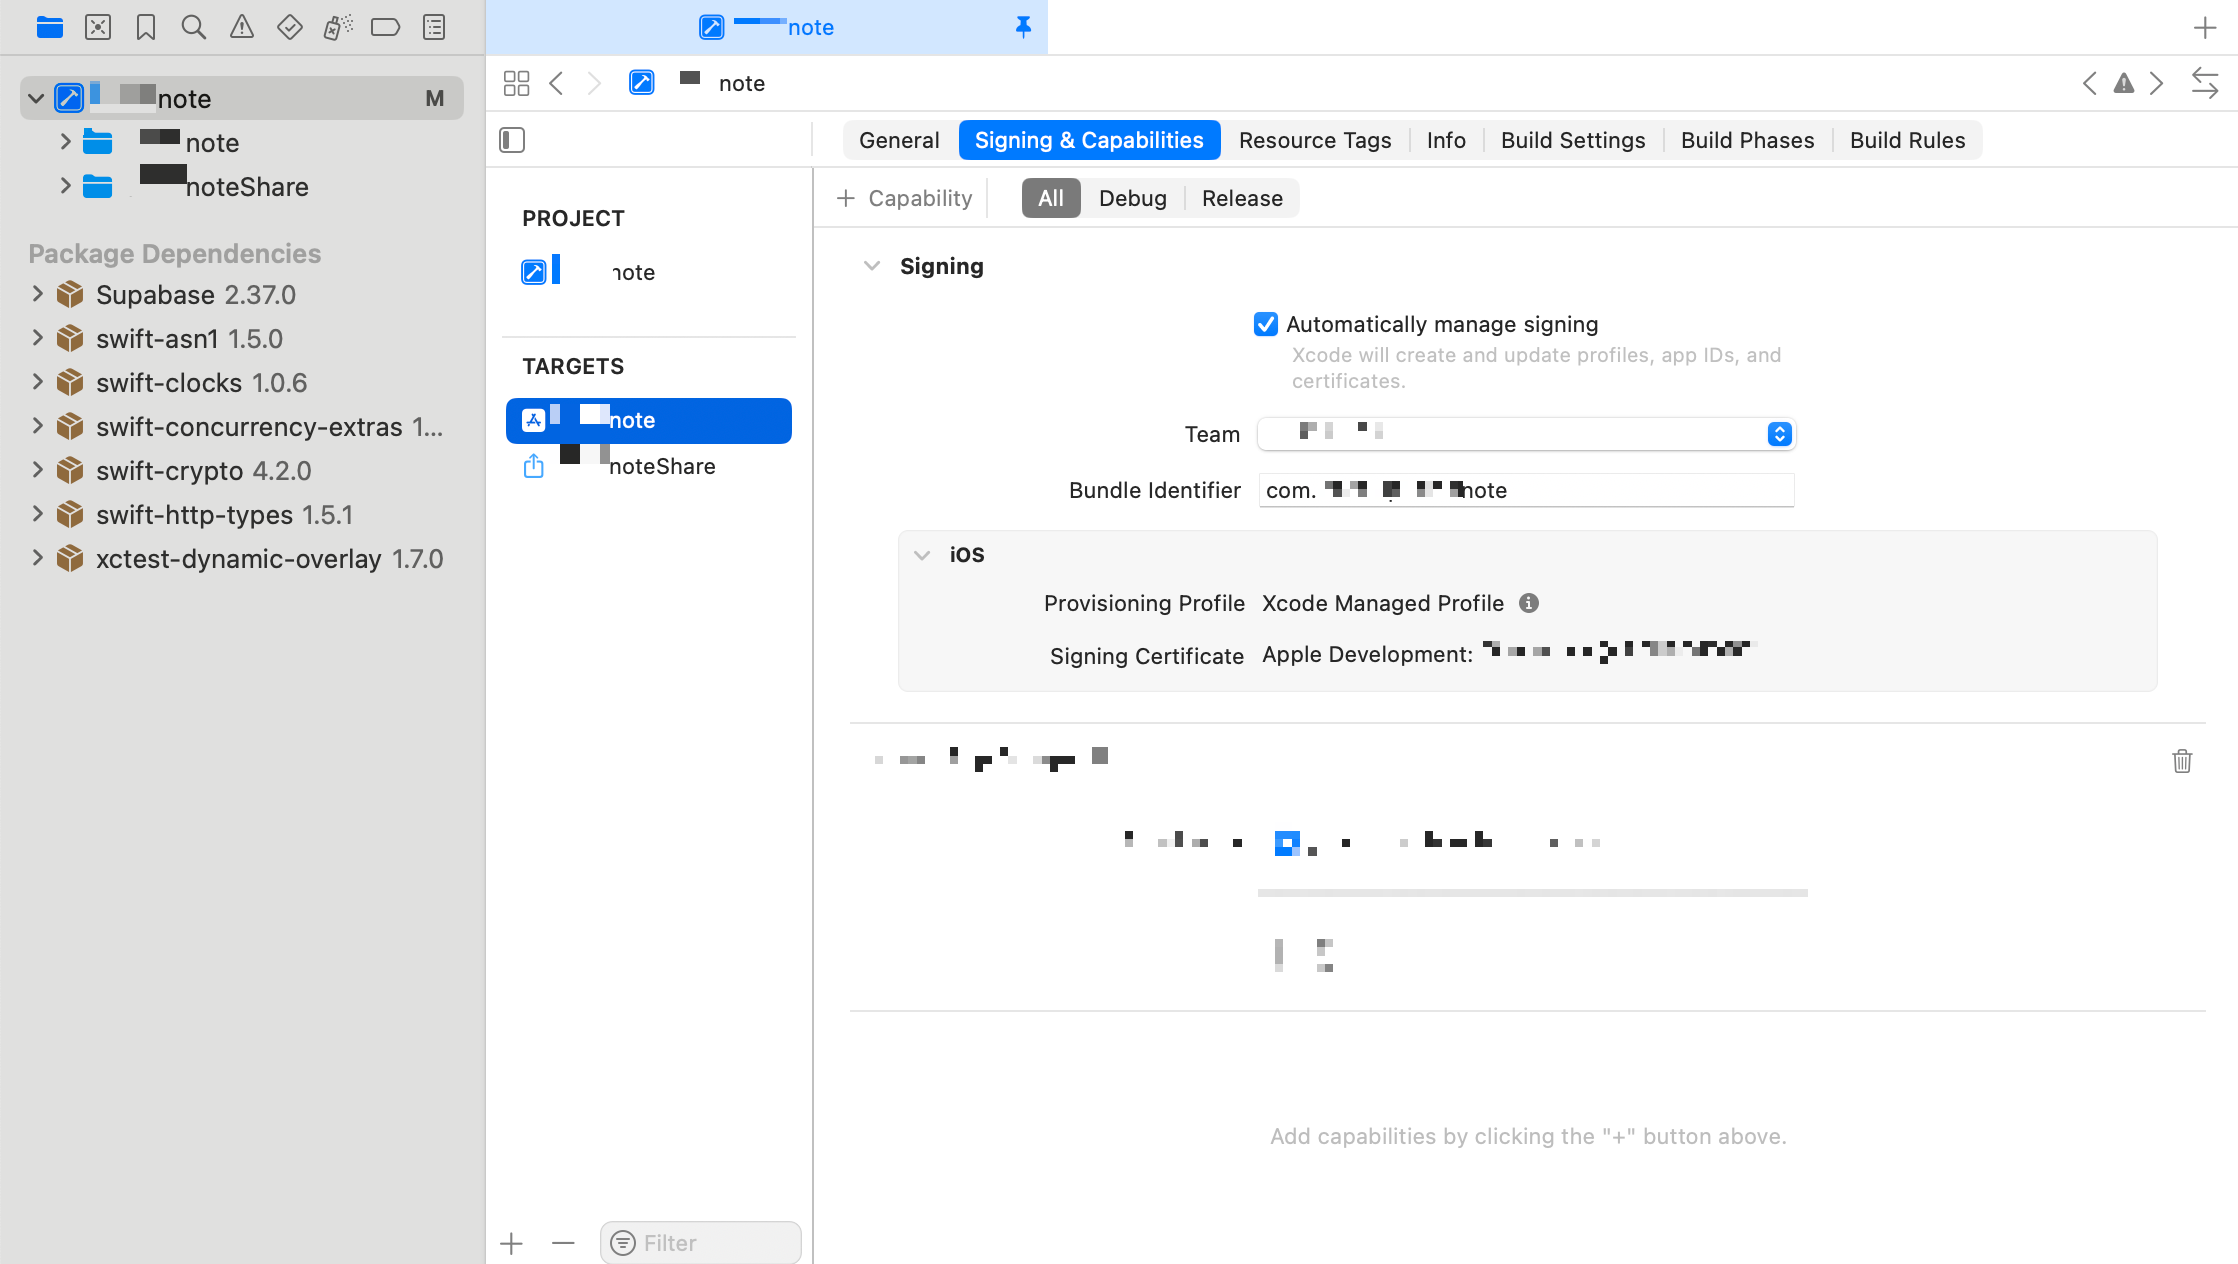
Target에서 앱 이름 선택 > Signing & Capabilities 클릭

여기서 위치상 General 바로 밑에 있는 + Capability 버튼 클릭
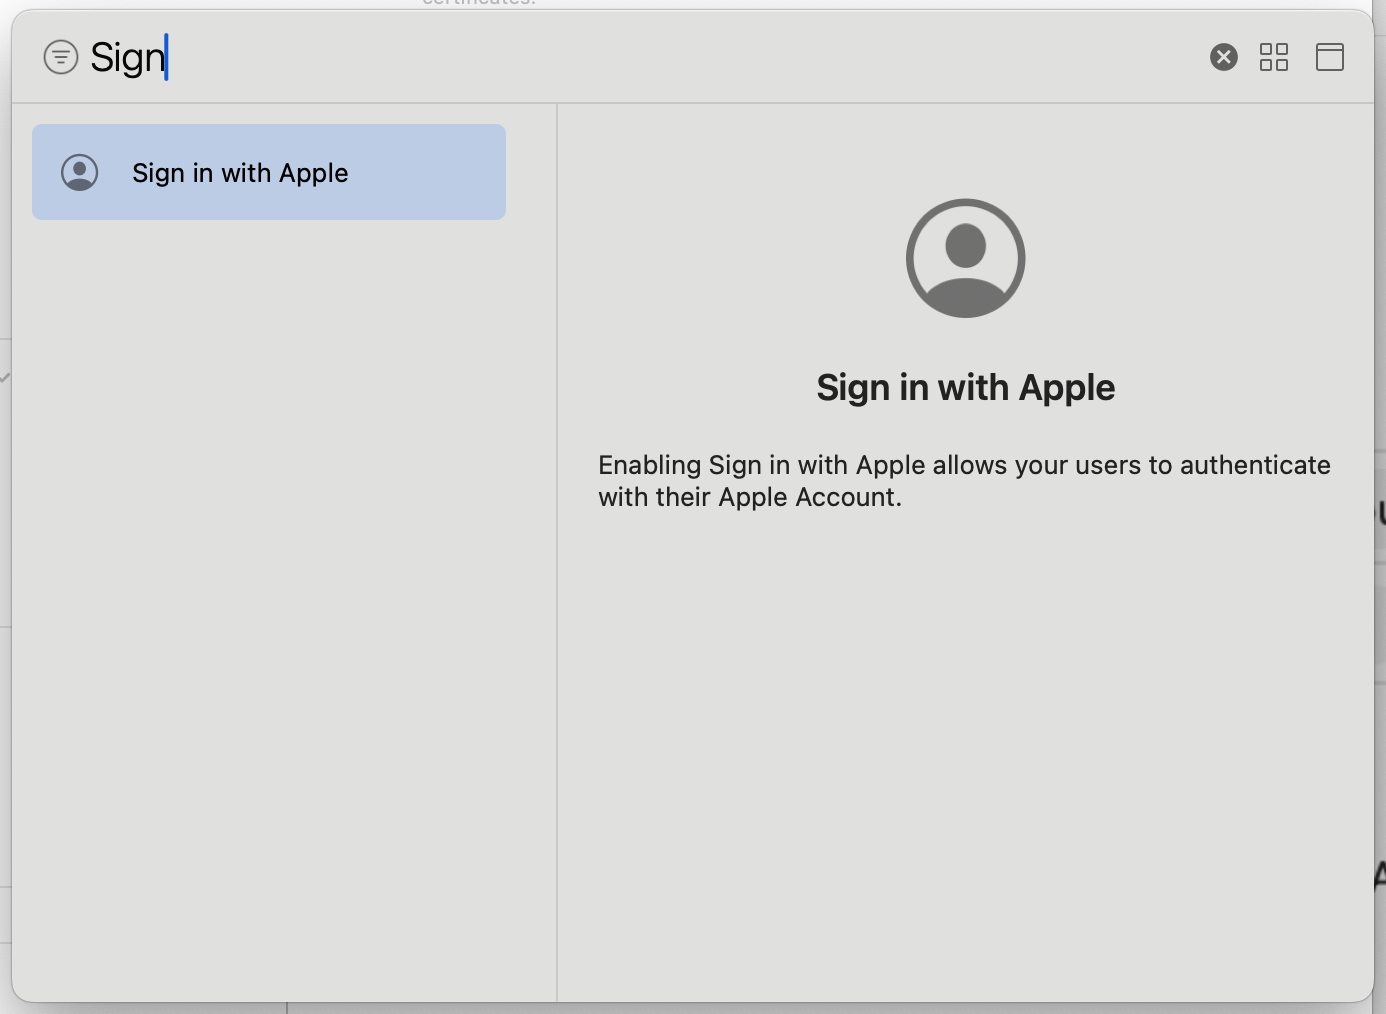
여러 서비스 목록 중에
Sign in with Apple 검색해서 더블클릭하면
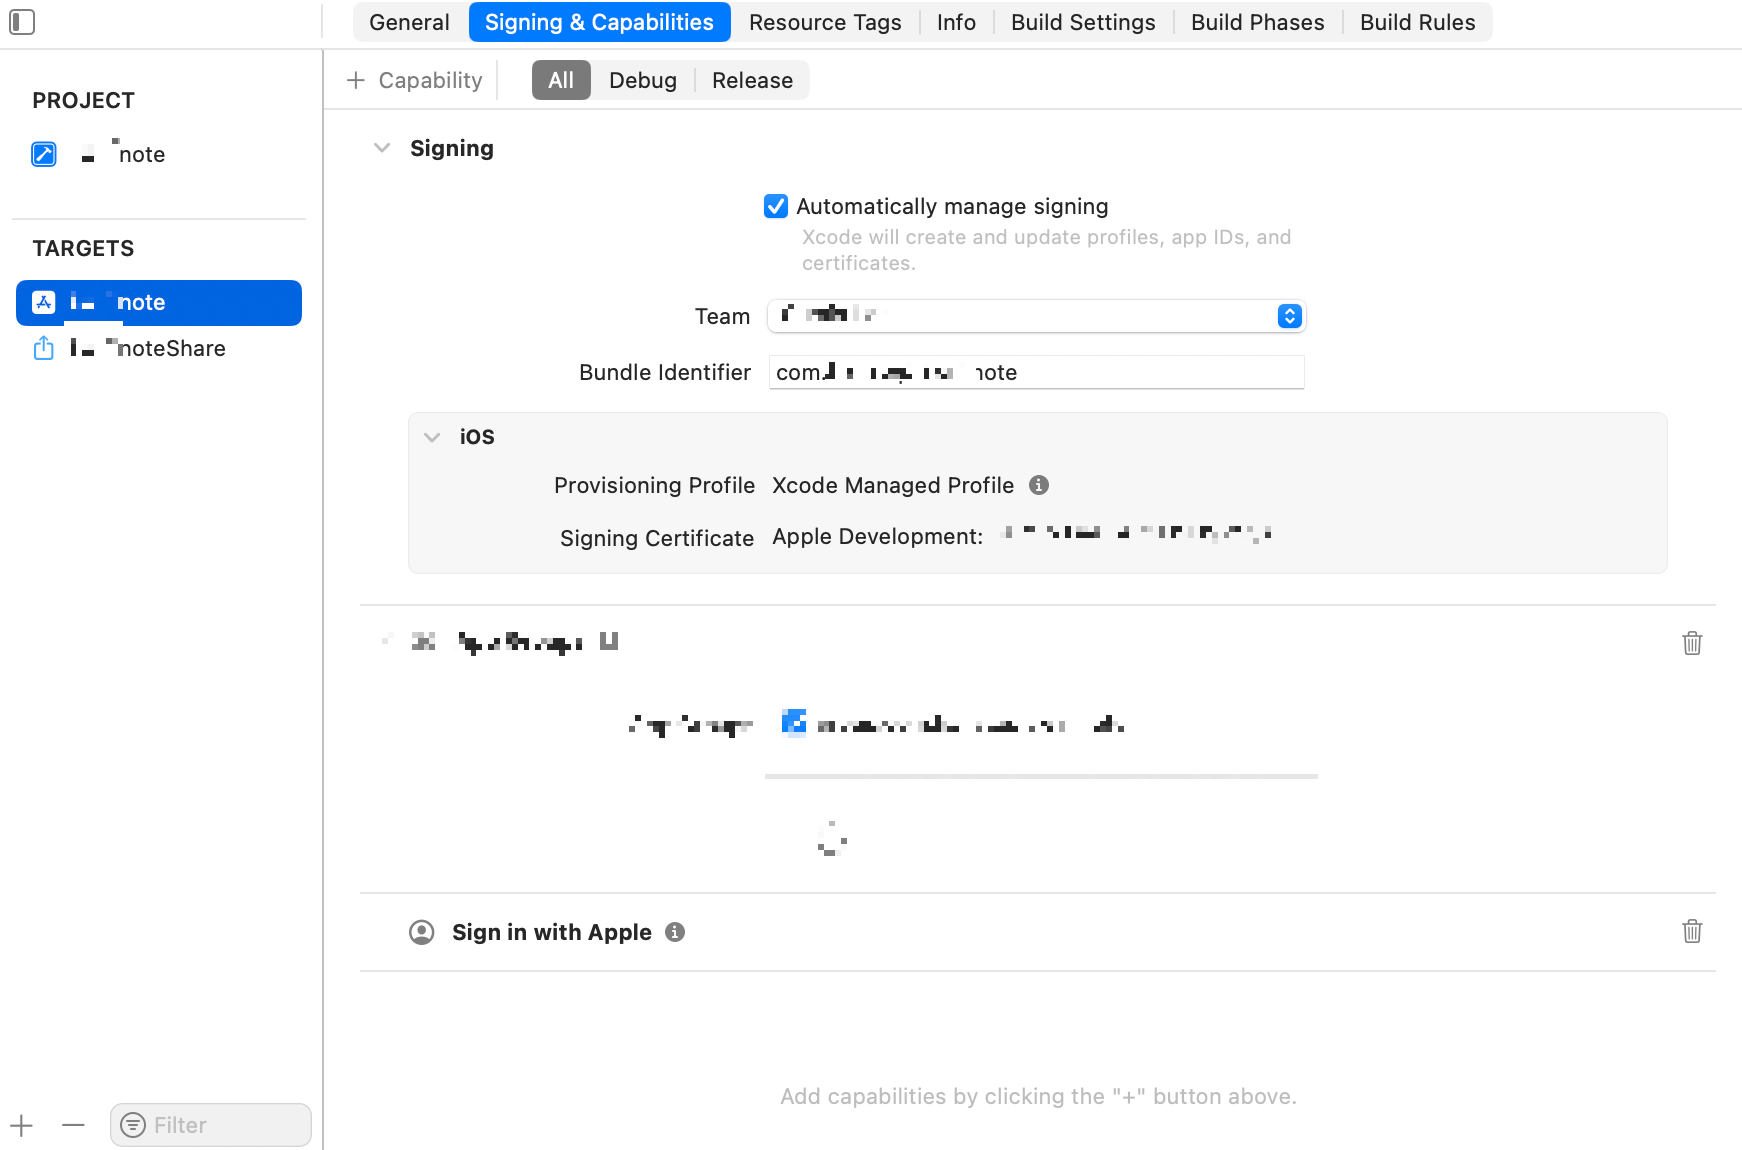
Capability에 추가된다.
애플 개발자 계정 웹페이지에서 직접 설정하는 방법도 있는데,
Signing > Automatically manage signing에 체크 되어 있으면, (위 이미지 참고)
기본적으로 Xcode에서의 설정이 개발자 계정에도 연동이 된다.
이제 준비는 모두 끝났다!!
4. 코드 작성
코드는 이 supabase 문서(1)에 있는 것과
그 문서에서 참조하고 있는 이 문서(2)에 있는 것을 조합했다.
문서 1에서는 supabase 클라이언트의 auth.signInWithIdToken을 호출해서
로그인을 시도한 다음, 사용자 정보를 받아와 supabase에 auth.update 하는 부분이 담겨 있고
문서 2(gotrue 예제코드)에서는 signInWithIdToken을 호출할 때
nonce 를 생성해서 넣어주는 부분까지 다루고 있다.
결과적으로는 두가지를 조합해서 써주는 게 궁극적인 형태라고 볼 수 있겠다.
import SwiftUI
import AuthenticationServices
import Supabase

struct SignInView: View {
	@State var nonce: String?
	let client = SupabaseClient(supabaseURL: URL(string: "your url")!, supabaseKey: "your anon key")

	var body: some View {
		SignInWithAppleButton { request in
			let nonce = randomString()
			self.nonce = nonce
			request.nonce = sha256(nonce)
			request.requestedScopes = [.email, .fullName]
		} onCompletion: { result in
			Task {
				do {
					guard let credential = try result.get().credential as? ASAuthorizationAppleIDCredential
					else {
						return
					}

					guard let idToken = credential.identityToken
						.flatMap({ String(data: $0, encoding: .utf8) })
					else {
						return
					}

					try await client.auth.signInWithIdToken(
						credentials: .init(
							provider: .apple,
							idToken: idToken,
							nonce: nonce
						)
					)

					// Apple only provides the user's full name on the first sign-in
					// Save it to user metadata if available
					if let fullName = credential.fullName {
						var nameParts: [String] = []
						if let givenName = fullName.givenName {
							nameParts.append(givenName)
						}
						if let middleName = fullName.middleName {
							nameParts.append(middleName)
						}
						if let familyName = fullName.familyName {
							nameParts.append(familyName)
						}

						let fullNameString = nameParts.joined(separator: " ")

						try await client.auth.update(
							user: UserAttributes(
								data: [
									"full_name": .string(fullNameString),
									"given_name": .string(fullName.givenName ?? ""),
									"family_name": .string(fullName.familyName ?? "")
								]
							)
						)
					}

					// User successfully signed in
					print("Sign in with Apple successful!")
				} catch {
					// Handle sign-in errors
					print("Sign in with Apple failed: \(error.localizedDescription)")
					// Show error alert to user
				}
			}
		}
		.fixedSize()
	}
}

func randomString(length: Int = 32) -> String {
	precondition(length > 0)
	var randomBytes = [UInt8](repeating: 0, count: length)
	let errorCode = SecRandomCopyBytes(kSecRandomDefault, randomBytes.count, &randomBytes)
	if errorCode != errSecSuccess {
		fatalError(
        	"Unable to generate nonce. SecRandomCopyBytes failed with OSStatus \(errorCode)"
		)
	}

	let charset: [Character] =
		Array("0123456789ABCDEFGHIJKLMNOPQRSTUVXYZabcdefghijklmnopqrstuvwxyz-._")

	let nonce = randomBytes.map { byte in
		// Pick a random character from the set, wrapping around if needed.
		charset[Int(byte) % charset.count]
	}

	return String(nonce)
}

func sha256(_ input: String) -> String {
	let inputData = Data(input.utf8)
	let hashedData = SHA256.hash(data: inputData)
	let hashString = hashedData.compactMap {
		String(format: "%02x", $0)
	}.joined()

	return hashString
}
References
https://supabase.com/docs/guides/auth/social-login/auth-apple?queryGroups=platform&platform=swift
Login with Apple | Supabase Docs
Use Sign in with Apple with Supabase
supabase.com
https://supabase.com/docs/reference/swift/introduction
Swift: Introduction | Supabase Docs
supabase.com
gotrue-swift/Examples/Shared/Sources/SignInWithAppleView.swift at main · supabase-community/gotrue-swift
A Swift client library for GoTrue. Contribute to supabase-community/gotrue-swift development by creating an account on GitHub.
github.com


댓글